Hi everyone! I thought I would share with you some fabric flowers that I made. I actually made several of these and plan on making more since I still have plenty of the same fabric left. Speaking of fabric. Remember last fall when I told you all that I made some outdoor curtains and used painters drop cloths to make them? Well I had plenty of leftover material and have already made a couple of purses with the material. Now flowers! I think that they turned out really nice and I enjoyed making them.
For the flower above. I simply had cut out what I thought looked like a petal from cardstock and used that as a template to cut several petals and glued them together. Then on top of that I did use a Sizzix die to cut out the piece of white lace and the following layer as well. I found the bling that I used for a center in the clearance section at Michael's and have had a pack of feathers for years which I tucked in between the layers.
This one is basically using all the same materials as the first one. I just made this one a rolled flower where I rolled a strip of the painters cloth and added to the middle of a die cut fabric flat flower. The bling I found on ebay and bought something like 50 for .01 and FREE SHIPPING! Can you believe that? It's true, I am finding lots of things for a penny and free shipping and putting them to good use.
Thanks for stopping by everyone. Talk to you later.
Friday, April 18, 2014
Friday, April 4, 2014
Bloom where you are planted mixed media
Hi everyone! I thought that I would share with you a mixed media piece that I made for a friend in the Netherlands. It's only a 4 x 6 piece but I loved making it. I can't remember if I shared with you how much I'm loving doing mixed media but I have been doing quite a bit lately. This is a piece that I feel most comfortable sharing with you right now. There are numerous layers and textures to this one. I used some tissue paper that came in a package from my friend Dee in South Carolina that was laying on my craft table at the time. I had an old book page that I cut up and wrote my sentiment on to title the piece. Of course acrylic paints...however at this point I do not remember what colors they were because when I get to making one of these pieces I don't really have a plan. I just sit down and whatever is close to me at the time is what I use unless it's a stencil or something. Which I decided on the tree stencil in this one and used texture paste so that it would be raised. Of course I used my pallet knife to make the tree bark and my faber castell markers for shading in some places.
I really enjoy doing mixed media. I know some who don't care to get their hands all dirty in the paints but I happen to find it soothing and use my fingers more to paint with than brushes on these types of things. I'm hoping to be able to start sharing more of my mixed media things with you soon. It's sort of hard to understand how these come about just by writing. But if you to like to do the mixed media then you know what I'm talking about.
I hope that everyone is having a wonderful day!
I really enjoy doing mixed media. I know some who don't care to get their hands all dirty in the paints but I happen to find it soothing and use my fingers more to paint with than brushes on these types of things. I'm hoping to be able to start sharing more of my mixed media things with you soon. It's sort of hard to understand how these come about just by writing. But if you to like to do the mixed media then you know what I'm talking about.
I hope that everyone is having a wonderful day!
Thursday, April 3, 2014
6 x 6 boxes from cardstock...
Hi everyone! I'm so sorry this post is just a tad out of order because obviously it should of been posted on Valentine's Day BUT...these boxes can be made for any holiday or occasion. I made three of them this year for my husband, son and mom. But by simply changing the card stock and embellishments you can customize them to whatever you chose. I saw Bona from Livelovescrap make these and the only difference was that she didn't put a window in hers with acetate.
They are super simple to make and I had planned and still plan to do a tutorial for these so you can make some yourself. Or you can skip on over to Livelovescrap and find the tutorial that Bona did yourself. I made all three of these in about an hour from start to finish.
I used Velcro for a closure in the back and even with all of that candy in them they really were steady and didn't fall apart. Of course my only suggestion would be to use the heavier card stock.
So this is a tutorial that you will be seeing on here soon.
I started my spring cleaning on yesterday and so far have logged 20 hours cleaning. Of course when I spring clean like most everything in the house gets a good "baptizing" and that takes time. I even wash my walls down. Why I do this when we don't even build fires in our fireplace is beyond me but it's something that I've always done. It's what my mom, aunts and cousins do as well. I know not everyone does that but we do. I decided to start with my two largest rooms this year and allot myself a full month to get everyone on the inside done while the pollen is falling and then May I can start the outside cleaning. I did get off schedule a tad today because when I took my curtains down in the kitchen to wash them I was in the laundry room and thought that it would be a good idea to just go ahead and do that room as well today since it's adjacent to the kitchen. So I'm glad to say that my kitchen and laundry room are both done and completed now. Tomorrow, I just need to wipe the inside of my stove out. I turned it on automatic clean today but you all know how you have to always go back and get the icky out. I would of done it tonight but my back just wouldn't allow me to get down in the floor again. So I'll start out with that in the morning by finishing the stove and then will be heading into the second largest room in the house....the living room. I don't have loads and loads of cabinets to clean out and such so maybe it want be to terribly bad. I can't complain to much about cabinets though...really the only one that was out of hand in the kitchen and not neat and orderly was the one underneath my kitchen sink and it was a hot mess and then some! I'd love to find a better organized way to keep my cleaning supplies all nice and neat. I've seen the stacked wire baskets under some sinks before but I don't think that would work for me because of the height of my cleaner bottles. So if you have a solution and possibly a link for a picture to give me some ideas I would greatly appreciate it if you would leave the picture link in the comments below.
It was gorgeous here today. I'm not sure what the temperature got up to but it felt much more like a nice warm spring day and made me long to do something outside rather than inside but I'm containing myself and waiting until all the pollen has fallen before I start outside. Have you all started your spring cleaning????
Ok well, it's late so I need to get myself to sleep so I will feel refreshed for another hard day of super cleaning. I am going to do a tutorial though for these little boxes real soon so you can see how simple they are to make.
Thanks for stopping by and be sure to leave me a comment if you can think of a solution for my under the sink cleaning supply problem.
They are super simple to make and I had planned and still plan to do a tutorial for these so you can make some yourself. Or you can skip on over to Livelovescrap and find the tutorial that Bona did yourself. I made all three of these in about an hour from start to finish.
I used Velcro for a closure in the back and even with all of that candy in them they really were steady and didn't fall apart. Of course my only suggestion would be to use the heavier card stock.
So this is a tutorial that you will be seeing on here soon.
I started my spring cleaning on yesterday and so far have logged 20 hours cleaning. Of course when I spring clean like most everything in the house gets a good "baptizing" and that takes time. I even wash my walls down. Why I do this when we don't even build fires in our fireplace is beyond me but it's something that I've always done. It's what my mom, aunts and cousins do as well. I know not everyone does that but we do. I decided to start with my two largest rooms this year and allot myself a full month to get everyone on the inside done while the pollen is falling and then May I can start the outside cleaning. I did get off schedule a tad today because when I took my curtains down in the kitchen to wash them I was in the laundry room and thought that it would be a good idea to just go ahead and do that room as well today since it's adjacent to the kitchen. So I'm glad to say that my kitchen and laundry room are both done and completed now. Tomorrow, I just need to wipe the inside of my stove out. I turned it on automatic clean today but you all know how you have to always go back and get the icky out. I would of done it tonight but my back just wouldn't allow me to get down in the floor again. So I'll start out with that in the morning by finishing the stove and then will be heading into the second largest room in the house....the living room. I don't have loads and loads of cabinets to clean out and such so maybe it want be to terribly bad. I can't complain to much about cabinets though...really the only one that was out of hand in the kitchen and not neat and orderly was the one underneath my kitchen sink and it was a hot mess and then some! I'd love to find a better organized way to keep my cleaning supplies all nice and neat. I've seen the stacked wire baskets under some sinks before but I don't think that would work for me because of the height of my cleaner bottles. So if you have a solution and possibly a link for a picture to give me some ideas I would greatly appreciate it if you would leave the picture link in the comments below.
It was gorgeous here today. I'm not sure what the temperature got up to but it felt much more like a nice warm spring day and made me long to do something outside rather than inside but I'm containing myself and waiting until all the pollen has fallen before I start outside. Have you all started your spring cleaning????
Ok well, it's late so I need to get myself to sleep so I will feel refreshed for another hard day of super cleaning. I am going to do a tutorial though for these little boxes real soon so you can see how simple they are to make.
Thanks for stopping by and be sure to leave me a comment if you can think of a solution for my under the sink cleaning supply problem.
Wednesday, April 2, 2014
Simple baby album
Hi everyone! I thought I would show you a super simple little baby mini album that I made using papers that I've had in my stash for years. I don't have a specific paper pad just for babies so I pulled some loose pieces to compile this mini. I do know that the little teddy bear on the front is from a sheet of K & Co from years ago and I just fussy cut the cute little bear out and popped it up on foam dots. It was already embossed so I thought that made a nice little touch.
The inside pages are extremely basic with very little embellishments. I only added baby stickers here and there in it because the main focus needs to be the baby plus it makes it simplier for the intended mother.
I forget now how many pages were in this mini album but since the pages were all the same with the flip up top and the pull out tags I didn't photograph each page.
Sometimes it's nice to have something super simple and easy to do. I wish that I had done a tutorial on this one now so you could see just how super easy it was to make and then you could embellish it however you chose too. I think I will add that to my to do list if it would be something that you would be interested in seeing from me.
Have a wonderful day everyone!
The inside pages are extremely basic with very little embellishments. I only added baby stickers here and there in it because the main focus needs to be the baby plus it makes it simplier for the intended mother.
I forget now how many pages were in this mini album but since the pages were all the same with the flip up top and the pull out tags I didn't photograph each page.
Sometimes it's nice to have something super simple and easy to do. I wish that I had done a tutorial on this one now so you could see just how super easy it was to make and then you could embellish it however you chose too. I think I will add that to my to do list if it would be something that you would be interested in seeing from me.
Have a wonderful day everyone!
Tuesday, April 1, 2014
Curiosities mini album in a box
Hi everyone! Thought I would share with you this mini in a box that I made back in February. I used the Graphic 45 Olde Curiosity Shoppe papers as well one sheet of the Graphic 45 Kraft Collection paper for a tag inside the mini. I also used the chipboard pieces from the Olde Curiosity Shoppe as well. The mulberry flowers are a mixture of Wild Orchid Crafts and I Am Roses. The metal butterfly I believe came from ButterBeeScraps and the ribbons, laces and ticket stub are from my stash.
The tag on the side is from the chipboard pieces from the collection and I used part of a chain that I had in my stash as well as the metal butterfly charm from my stash that was gifted to me by Ashliegh at Scrapsbuttonsandbows.
I'm sorry that this picture blurred. I didn't realize it until I had uploaded the pictures and no longer have the mini to do a re-take.
Here is the small mini that I put inside the box. Oh and by the way. The box is made out of chipboard as well. I used the same paper collection for the mini as well as the chipboard pieces and some lace from my stash. I wanted the front cover to look like it was a little window sill with lace curtains.
As you can see on the inside, there are several places to add pictures and memorabilia. Lots of flips and flaps even though it's only a two page mini album.
You can slide pictures behind each of the picture frames.
Several tags were hidden in behind the flip up for additional pictures and journaling.
This tag pulls out as well as opens up for more pictures and I forgot to photograph where I had stamped the inside of the tag.
More flips and flaps.
I used my bone folder to hold up the flip up so you could see the tags underneath as well as the little booklet type pages on the back.
I didn't have a pattern on this one and made it up as I went along. I love thinking of new ideas when making these little minis. However, the box was something that I had seen Bona from Livelovescrap make. I just decided to make mine out of chipboard instead of heavy card stock like she showed. I was quite pleased with it and love the papers from this collection.
Oh as I'm looking at this last picture, I can see that I also used a piece of Graphic 45 Ladies Diary for one of the tags. I just love how you can mix and mingle their collections.
Have a wonderful April Fool's Day everyone!
The tag on the side is from the chipboard pieces from the collection and I used part of a chain that I had in my stash as well as the metal butterfly charm from my stash that was gifted to me by Ashliegh at Scrapsbuttonsandbows.
I love this paper collection with all of the butterflies on it.
Here is a close up of the flower cluster on the front of the box. There are two layers of ribbons and lace as well as the skeleton leaf that you can see clearer in the above picture.I'm sorry that this picture blurred. I didn't realize it until I had uploaded the pictures and no longer have the mini to do a re-take.
Here is the small mini that I put inside the box. Oh and by the way. The box is made out of chipboard as well. I used the same paper collection for the mini as well as the chipboard pieces and some lace from my stash. I wanted the front cover to look like it was a little window sill with lace curtains.
As you can see on the inside, there are several places to add pictures and memorabilia. Lots of flips and flaps even though it's only a two page mini album.
You can slide pictures behind each of the picture frames.
Several tags were hidden in behind the flip up for additional pictures and journaling.
This tag pulls out as well as opens up for more pictures and I forgot to photograph where I had stamped the inside of the tag.
More flips and flaps.
I used my bone folder to hold up the flip up so you could see the tags underneath as well as the little booklet type pages on the back.
I didn't have a pattern on this one and made it up as I went along. I love thinking of new ideas when making these little minis. However, the box was something that I had seen Bona from Livelovescrap make. I just decided to make mine out of chipboard instead of heavy card stock like she showed. I was quite pleased with it and love the papers from this collection.
Oh as I'm looking at this last picture, I can see that I also used a piece of Graphic 45 Ladies Diary for one of the tags. I just love how you can mix and mingle their collections.
Have a wonderful April Fool's Day everyone!
Sunday, March 2, 2014
Shabby Chic Easel card with drawer & Card in a box...
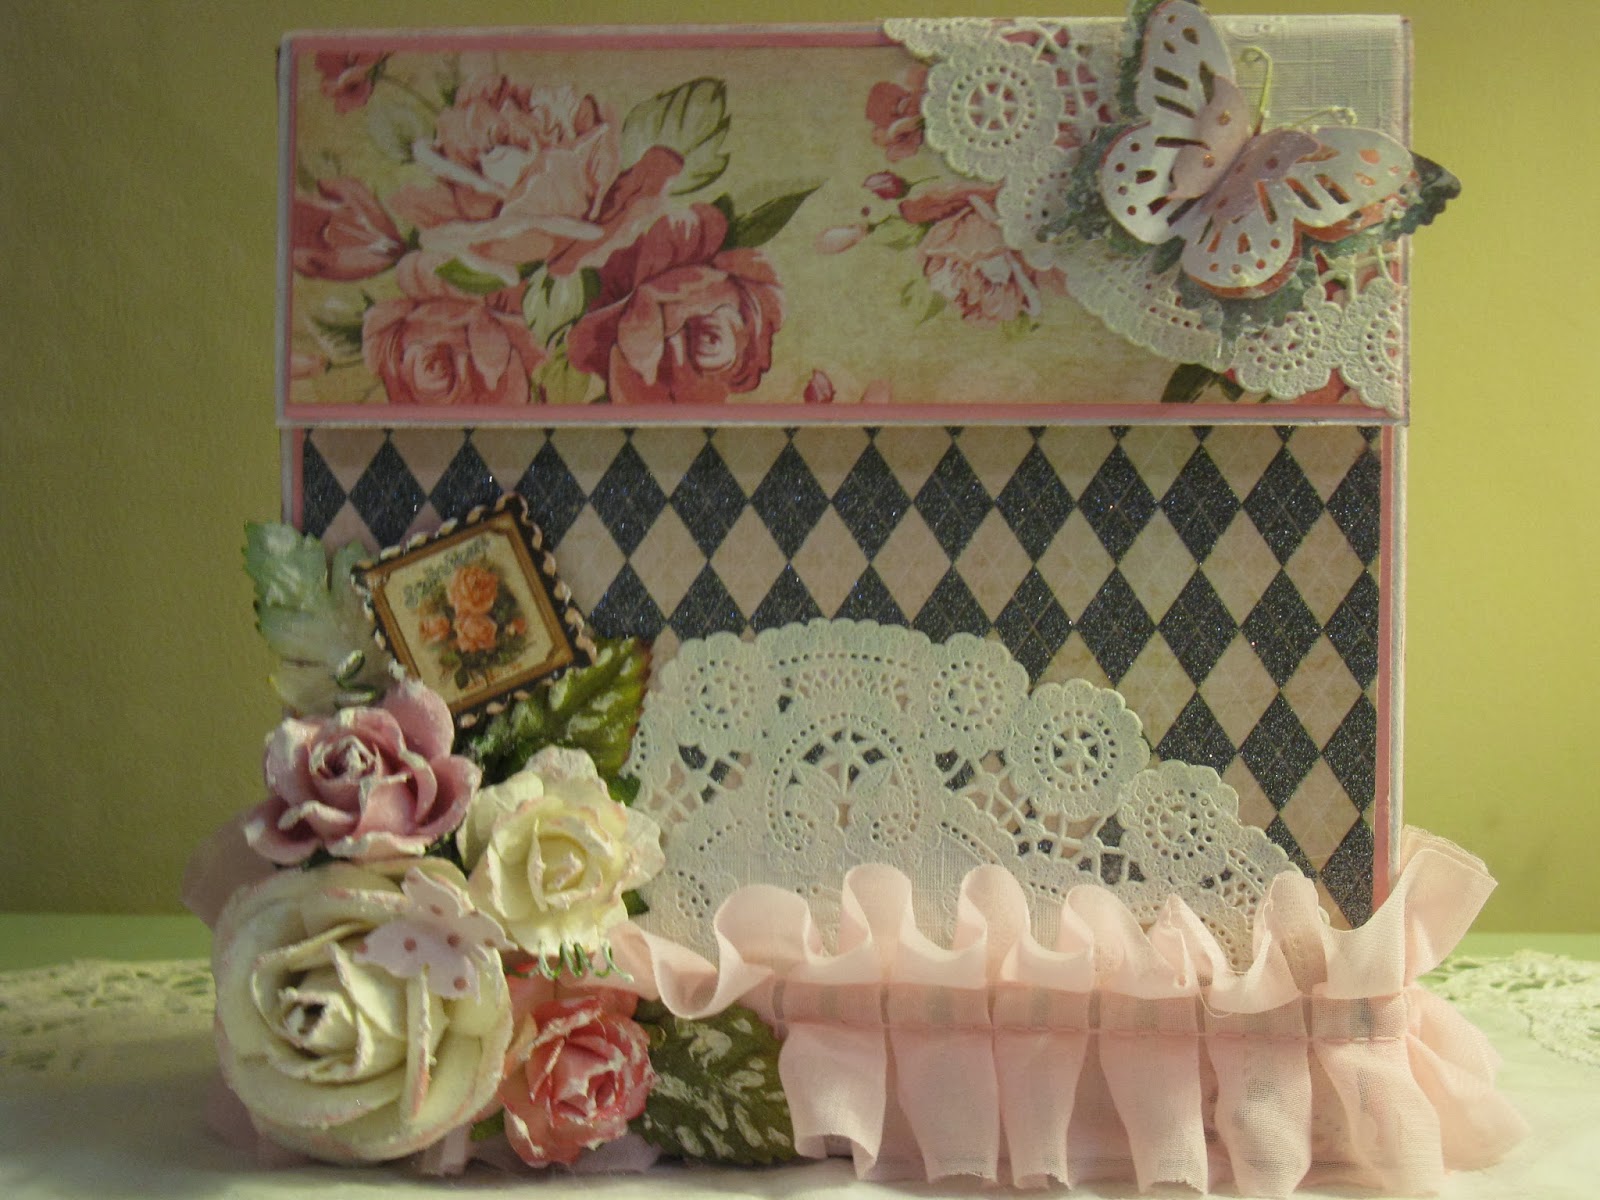
I made two of these easel cards with drawers and you will see the two boxes as well that I made with cards inside. I used the Primrose paper stack by DCWV and I absolutely love this paper stack. It's such a beautiful stack to work with. The flowers are by Wild Orchid Crafts and ohhh how I love these flowers as well. I'm needing some more pink ones right now and need to place an order because they take quite a while to get here from overseas.
I hope you enjoyed them and found some inspiration thru looking at them. Thanks for stopping by and come back and see me!
Saturday, March 1, 2014
St. Jude Children's hospital cards....
Hi everyone,
Myself and a bunch of other crafty ladies got together and made a ton of Valentine's cards for the kids at St. Jude. We received a letter back from them saying how much they appreciated them. The following pictures are the "cards" that I made. Some or most have some type of toy or stickers and for the older kids there were bookmarks and bracelets. For some reason I didn't get a picture of one of the cards that I sent. I had made 6 or 7 of those and of course made multiples of everything else you will see in the pictures.
Please support St. Jude if you can. Thank you for stopping by everyone and I hope that you are having a wonderful day! Robin
Subscribe to:
Posts (Atom)