Hey everyone! Well a little over 6 hours later I'm FINALLY able to get this posted. It's not because I was doing sooooo many other things today either...it's because me and blogger just wasn't seeing eye to eye on this and was refusing to post my pictures and when it did they would be upside down or sideways or would just lock the computer up all together so back to square ONE I would have to go. So before I lose all the pictures again hopefully I can get everything typed on here and in detail so that for those of you that want to make one you can. This is my design, if there is another one online somewhere then I don't know about it and have never seen it before. However, the binding technique is one that I learned from Laura Dennison over at Following the Paper Trail and I feel sure that she can teach you all much better as to how put the rings in for your binder. I used K & Company's Urban Rhapsody for this project along with some acetate sheets (recycled)

For this mini album I used the larger lunch size bags that you can buy at Micheals.
First off take and cut off 1/8" off the opened end of the bag to get rid of the little squigglies. Then measuring from the BOTTOM of the bag up, score at 5 1/2" and fold the top of the in the opposite direction AWAY from the factory bottom flap as shown in the picture below....
Now open that side back up that you just scored and folded and follow along with the picture with these instructions. If you need to go ahead and blow the picture up so you can read what I've wrote better. Apply glue on flap side that you just scored and folded about 3/4" up and the width of the flap. This will be the bottom for your "shipping tag" later on and must be done at now.
Once you have that done. Your ready to start covering your paper bag with pretty patterned paper. I used several different ones on my entire album as well as the sample I did so you could better see where things were placed. This is the dimensions you will need first. 6 3/4" x 4 1/2" and then score that at 2 3/4", this will give you the fold you will need to go around to the back or front. You will use the short side to cover the factory bottom flap of the bag which will later become a pocket.
As you wrap your patterned paper around the bag be SURE to tuck your patterned paper into the bottom of the flap to hold it securely in place like the picture below.
Now onto the next different patterned paper for the opposite side. Cut a 6 1/2" x 4 1/2" piece and score at 3".
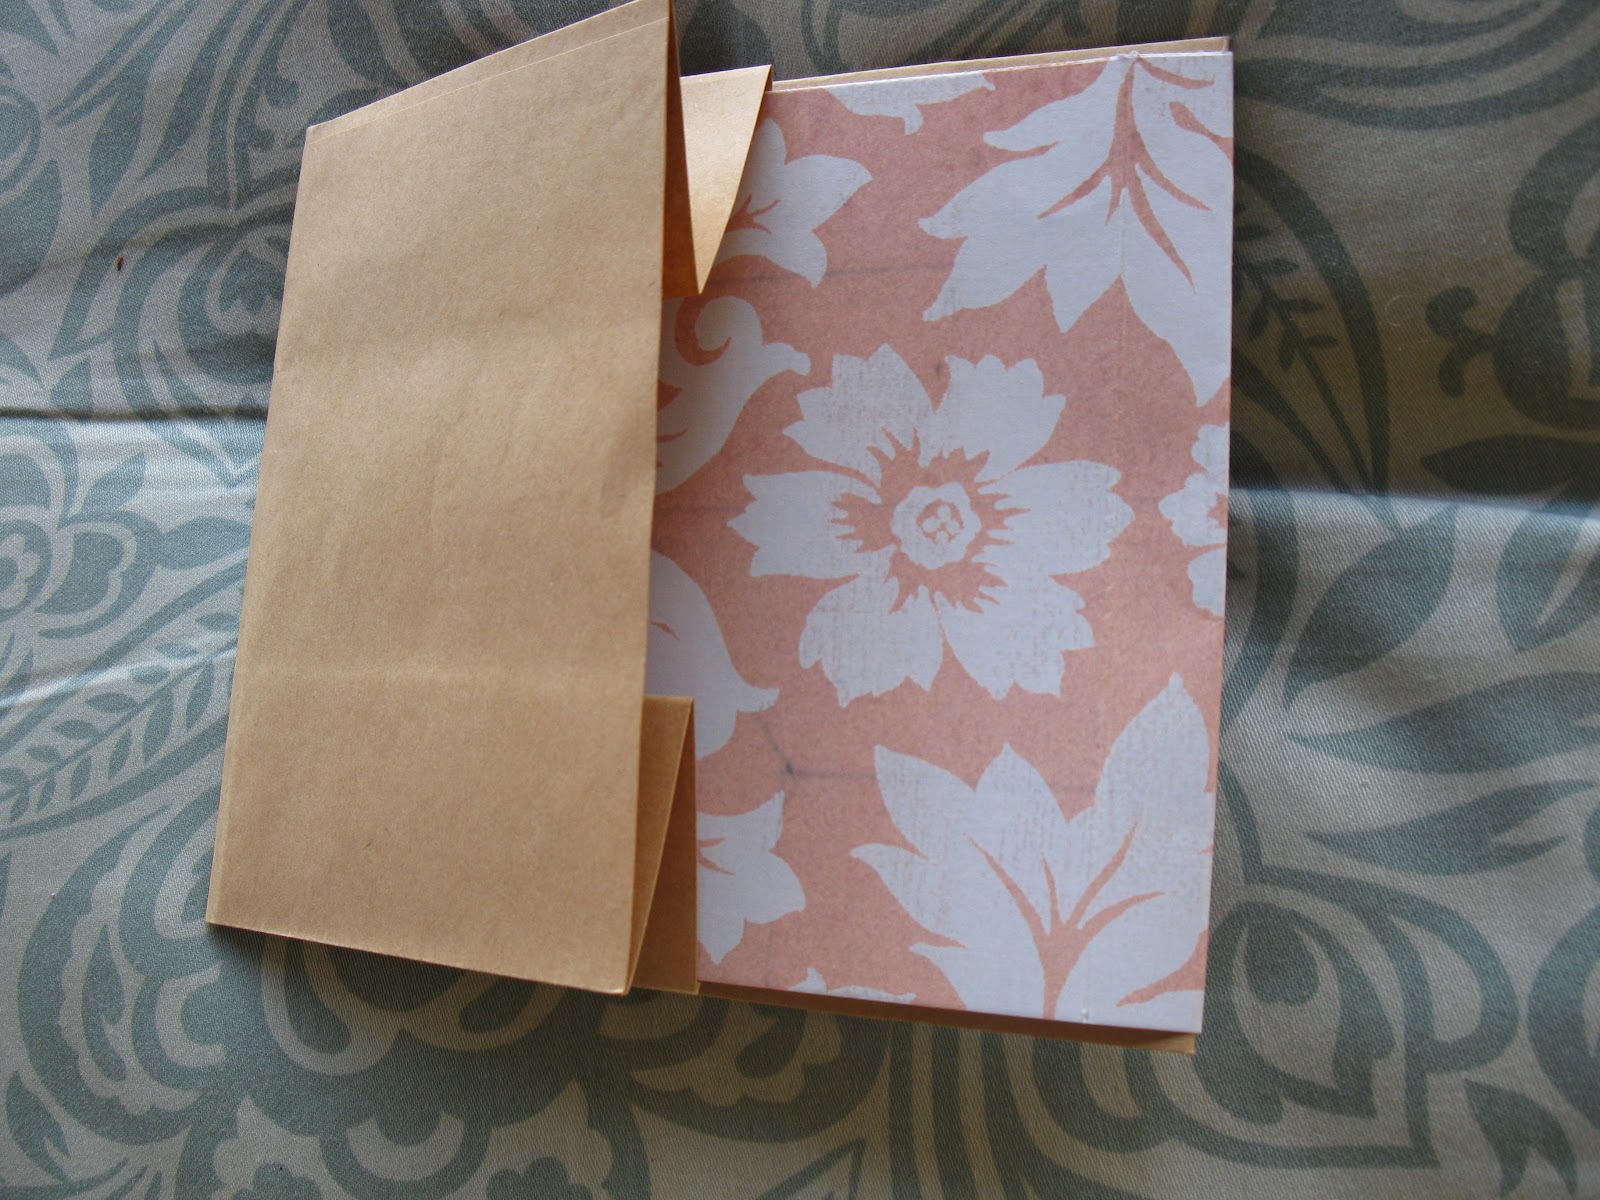
Just like before wrap your paper all the way around using your score as your guide and tuck the paper underneath the back flap. I have placed the scored paper under the paper bag in the pictures so you can get a better visual as to what I am talking about.
The tags that you will need for the end where you had cut off 1/8" are 4 3/4" x 4 1/2" and you will need 2 of those.
To make the lift up flap for the back of the "page" you will need another patterned paper that is 5 3/4" x 4 1/2" and then score that at the top at 1" and you can round your corners at the bottom like I have in the picture above.
Before I tell you where to glue the lift up flap you can go ahead and place a bead of glue on either side of the factory bottom flap to make another pocket. If you look closely in the picture above you will see that I have wrote GLUE where it is suppose to go. And the tag for that pocket is 3 1/2" x 4".
Now back to gluing in that lift up flap. Please look closely at the picture above to find your correct placement of the flap. It will be the very center seam of the bag. I have opened it up to show you as best I could while still taking the picture for you. You will place it as far to the left side as you can where my thumb and hand are opening the bag. Be sure to put glue on the front and back side of your flap ABOVE the score line so that it will seal the bag seam closed.
Once you've done that the back side of your "page" will look like the picture above.
And the above picture here is what it will look like when you raise the flap. The picture below is one I took of my completed front page so you will have a good reference and can see how things are placed.
And the picture below here is what the back side of my page looks like in my mini album. One thing to note is. The end of your page that has the factory bottom flap is the end that you will also be putting your eyelets in to bind your album. At the end of this tutorial I will list how many bags I made to complete my album.
This is what the "portfolio" page looks like opened up.
One thing I would like to say is. You don't have to put your pages in your album all one way. I switched mine up and did a few the opposite way as you can see in the picture below. Its your album, you can do it whoever you want to.
Now for the count of how many pages I used. I used 4 paper bag pages, 3 "portfolio" pages and 3 acetate pages that measure 5 1/2" x 4 3/4". You can look at the last picture on this post for that. IF you can see the acetate.
Now for the cover. First off, please go to Following the Paper Trail and watch Laura show you how to make the binding that I used in this album. Even though the pages themselves are what I've come up with, like I said at the beginning the binding part I learned from her. But I did however try my best to draw out the measurements and posted the picture above for you. But NOTE**** this ONLY works for the larger Tim Holtz D rings. If you decide to use O rings you will need to refigure and Laura teaches how to do that perfectly. As a matter of fact I believe that Elsa over at Just a Few Designs even shows how to do this same binding technique.
So now what you will need as far as chipboard and pattern paper for your cover. It is as follows:
Chipboard
(2) 5 " x 5 3/4"
(1) 2 " x 5"
Pattern paper for the OUTSIDE cover
(2) 7 1/2" x 6" butting the paper together at the center where the 2" spine is
Pattern paper for the INSIDE lining
(2) 6 3/4" x 4 3/4" and again butting those papers up in the middle at the spine
For the Inside pockets in the front and back covers
(2) 4" x 5" pieces of pattern paper
the tags for those pockets need to be 4 1/8" x 4 3/4"
Here is the acetate sheet that I did and added matching butterflies to the front and back of the page. It's really hard to see but it's there..trust me.
Now really all that you have to do is add the file folder tabs in the locations like you see in my completed album and embellish it and add pictures and your good to go.
I did make the flowers on the front cover but I'm sure that everyone has seen how those are made before numerous times so I want bore you with that.
I hope that I haven't forgotten anything majorly important for this tutorial. I was at my wits end just trying to get it on here for you all. If I see that I've missed a step or if one of you all see that I have then please by all means let me know so that I can change it or add more information.
Thanks and Happy Scrapping!


OMG O M G RObyn!! I love love love this mini...I am so gonna scrap lift this...is that ok?? I have that very same paper pad and have been wanting to use it. I just wanted to pop in and say thank you for leaving me a lil bit of love on my blog...thank you for your support. It truly means a lot. Great mini album girl love it!!
ReplyDeleteYou are more than welcome to scrap lift it and have a blast making yourself one.
ReplyDeleteHappy Scrapping! :)
Hi Robin,
ReplyDeleteI just found this tutorial and can't wait to make the awesome paper bag pages. Just one question, is a "portfolio" page just a plain, flat page? That's what it looked like in the photos. Thanks. Elsie
Hi! Yes the "portfolilo" page is just a piece of pretty cardstock that is folded over and then scored so the it will bend and open easier after you put it in your album. I believe that I've given that mini away so I can't get measurments for you. However, I will look and see if I happen to still have this particular mini. I give most of the ones I make away. It's rare that I ever get time to keep one. But I love to see the look on people's faces when I give them one of my creations. Hope that this helps. If not then please send me another comment and I'll go dig in my stash and see if I do happen to still have the album and can give you all the measurements. Thank you for pointing that out and Happy Scrapping!!! :)
ReplyDelete