Hey everyone! Well here it is.....it's not only my first Halloween mini album but it's also my first paper bag mini album as well. Let me tell ya...I had a lot of fun making this one but was a bit disappointed when I went to looking for pictures to go inside it. I still don't have them printed off and placed in the album yet but I had such a hard time coming up with pictures of my son dressed up. It was so disheartening to me. I'm not sure why I didn't take many Halloween pictures. I had thought that I would have to make 2 Halloween mini albums to get all the pictures in but that's just not the case at all. But anyway...enough of my sorrows about the pictures, let me go ahead and describe the album to you.
First off, just about everything in this album came from scrapbuck.com. I don't think that I shared my haul with you when I received all this great stuff several weeks ago. But just about everything in here came from their online store. I first used We R Memory Keepers Heebie Jeebies paper line along with some plain cardstock. The roof of my little haunted house was used cutting strips of black cardstock using the Fiskars sunflower scissors and then layered on top of one another so that it would look like shingles. I also used a Martha Stewart punch to make the top decorative piece...it was an edge punch but I don't remember the name of it. I'm thinking its something like gothic arches or something like that. After I did all of that I sprayed the roof of the house with glimmer mist (Diamond Dust) and it gave the roof a nice patina. Then of course I used the new Martha Stewart iron gate deep edge punch for the widow walk on the roof....that is what those are called right? There are little bats on the fence that I added some glitter too so that they would stand out. Now onto the body of the house. I haphazardly cut small strips of chipboard and laid them out so that they would form my windows. There are several layers to the windows...first off after I cut those chipboard pieces I used some charcoal ink to make them look old then I used some of the acetate packaging from some stickers I had used to make "glass" for the windows and added some coffee stained cheese cloth as my torn and tattered "curtains" then I added a sticker on top of the acetate but behind the "panes" so it looked as if you were peeping into the windows....or that someone was peeping out..whatever be the case. Then I used some glittered ghost stickers, an Enter at your own risk sticker above the door and then I used the Martha Stewart iron gate edge punch again at the bottom. I'll get to the door in a second...

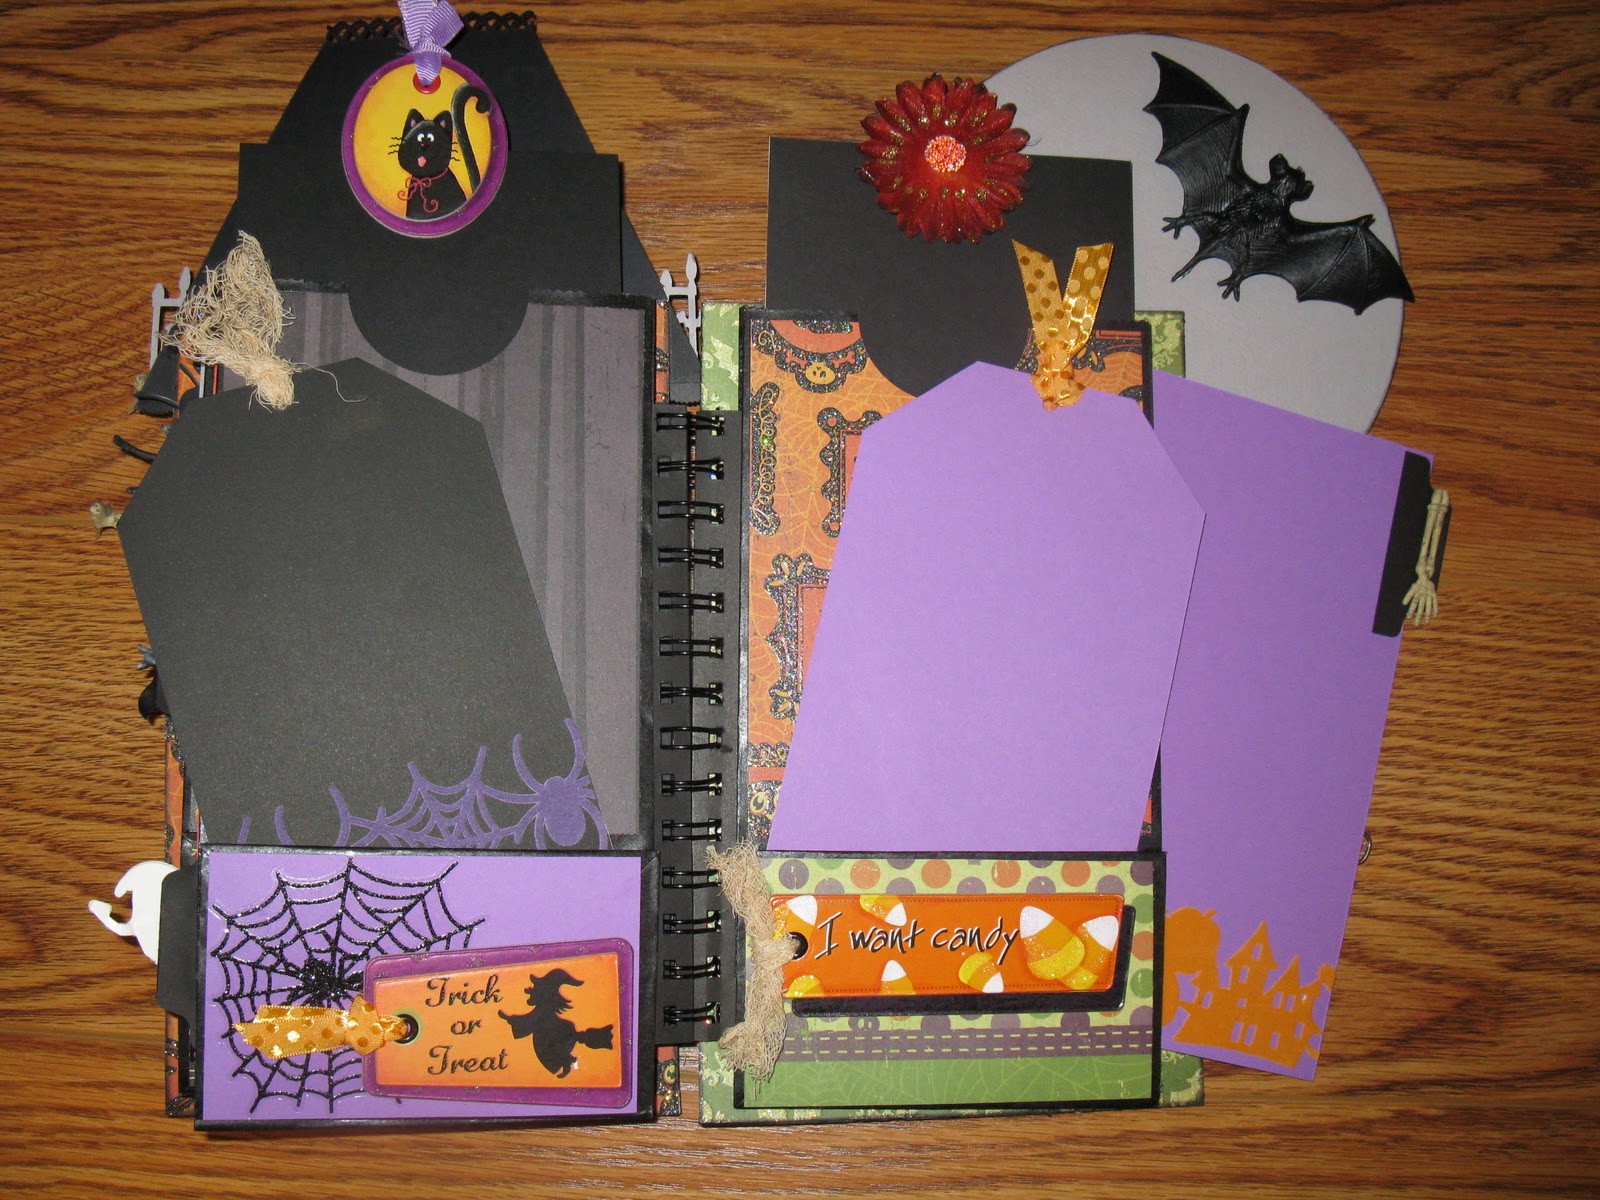
Here you can see that on the binding I used a small skeleton that I found at Dollar Tree. I added some googly eyes to him as well as a little black and white bow around his neck. (I just had to make him a bit cute) then I cut strips of the coffee stained cheese cloth and tied that to the binding as well. I hung Mr. Skeleton from the binding using a Tim Holtz clasp.
Here's a peep of what appears when you open the front door....it's just an old witch stirring her brew. On the outside of the door I used a Memory Makers metal keyhole brad and then since I had an entire string of those skeletons, I decided that I'd cut one of them up to see what I could make with the "parts". So I sliced his skull in half and added some red glitter to his eyes and it now adorns the front door. (hmmm this description of how I dissected the skeleton sounds scary
) then I needed something for my hinges so I cut slits of the Iron Gate punch and glittered them to make my hinges and added an EEEK 3D sticker.


Ok so here is that last page. I plan on using the front and back covers to put notes and journaling to my son. I know that one day he will get all these albums so I wanted to first off apologize to him for not taking more pictures of him dressed up but then also talk about all the things I remember about Halloween when he was just a little fellow. It just breaks my heart that I don't have more pictures than what I do of him dressed up. However, I do still have 2 of his Halloween costumes from when he was a toddler. I used to order his costumes from The Disney Store...so he was both Pooh and Tigger.....the sad sad thing is...I don't have a picture one of him in his Pooh costume and he loved Pooh the best. Let me tell you when he was a toddler Pooh was playing on tv 24/7. I had memorized every line to every Pooh video there was and yet.....not one single picture of him in his costume. I plan on saving those costumes and one day maybe I'll get to take pictures of grand babies in them.
I hope that everyone is having a wonderful Tuesday! As for me I'm headed back to the craft room to see what else I can get brewing in my cauldron and as always you all know that I'll be sharing with you what else I come up with......so come on back and visit soon.


OMG!!!!! I love it, excellent job!!!!!
ReplyDeleteSis, the dimensions are so great.. The plastic skeleton on the binder side is so perfect..and the MOON...well just all of it.. ! You have done it AGAIN!!!!! xoxoxo
ReplyDeleteHi there, just wanted to come by and say WOW! lol I love your halloween book. I think I want to make one like this, i love how you placed the moon so it contiues to show after each page is turned. BRILLIANT!!
ReplyDeletetfs!!!
hugs
Elsa
Hello!
ReplyDeleteThis is so wonderful! I love it!
Wishing you a great weekend and a Happy Halloween!
Hugs,
Barbara Diane