Hi everyone! Hope that you all are all having a great day! I thought I'd share with you a little project that I finished up a few days ago. I had gotten this idea from Fiona who is Jennings644 on youtube and I will provide that link for you at the end so you can jump on over there and see what inspired me to make this little trunk. If you all have been following my blog then you know that I love old trunks and really enjoy refurbishing them. Well when I saw Fiona making a "witches chest" and showed us how she did it I had to make a little steamer trunk with my added touches.
I had placed an order with Butter B Scraps on Zibbet and loved the little metal embellishments that I received I had cut up one of the flowers to make the little feet, corners and trunk handle ends. I used a piece of leather and then stained it with ink to make it black for the little handles.
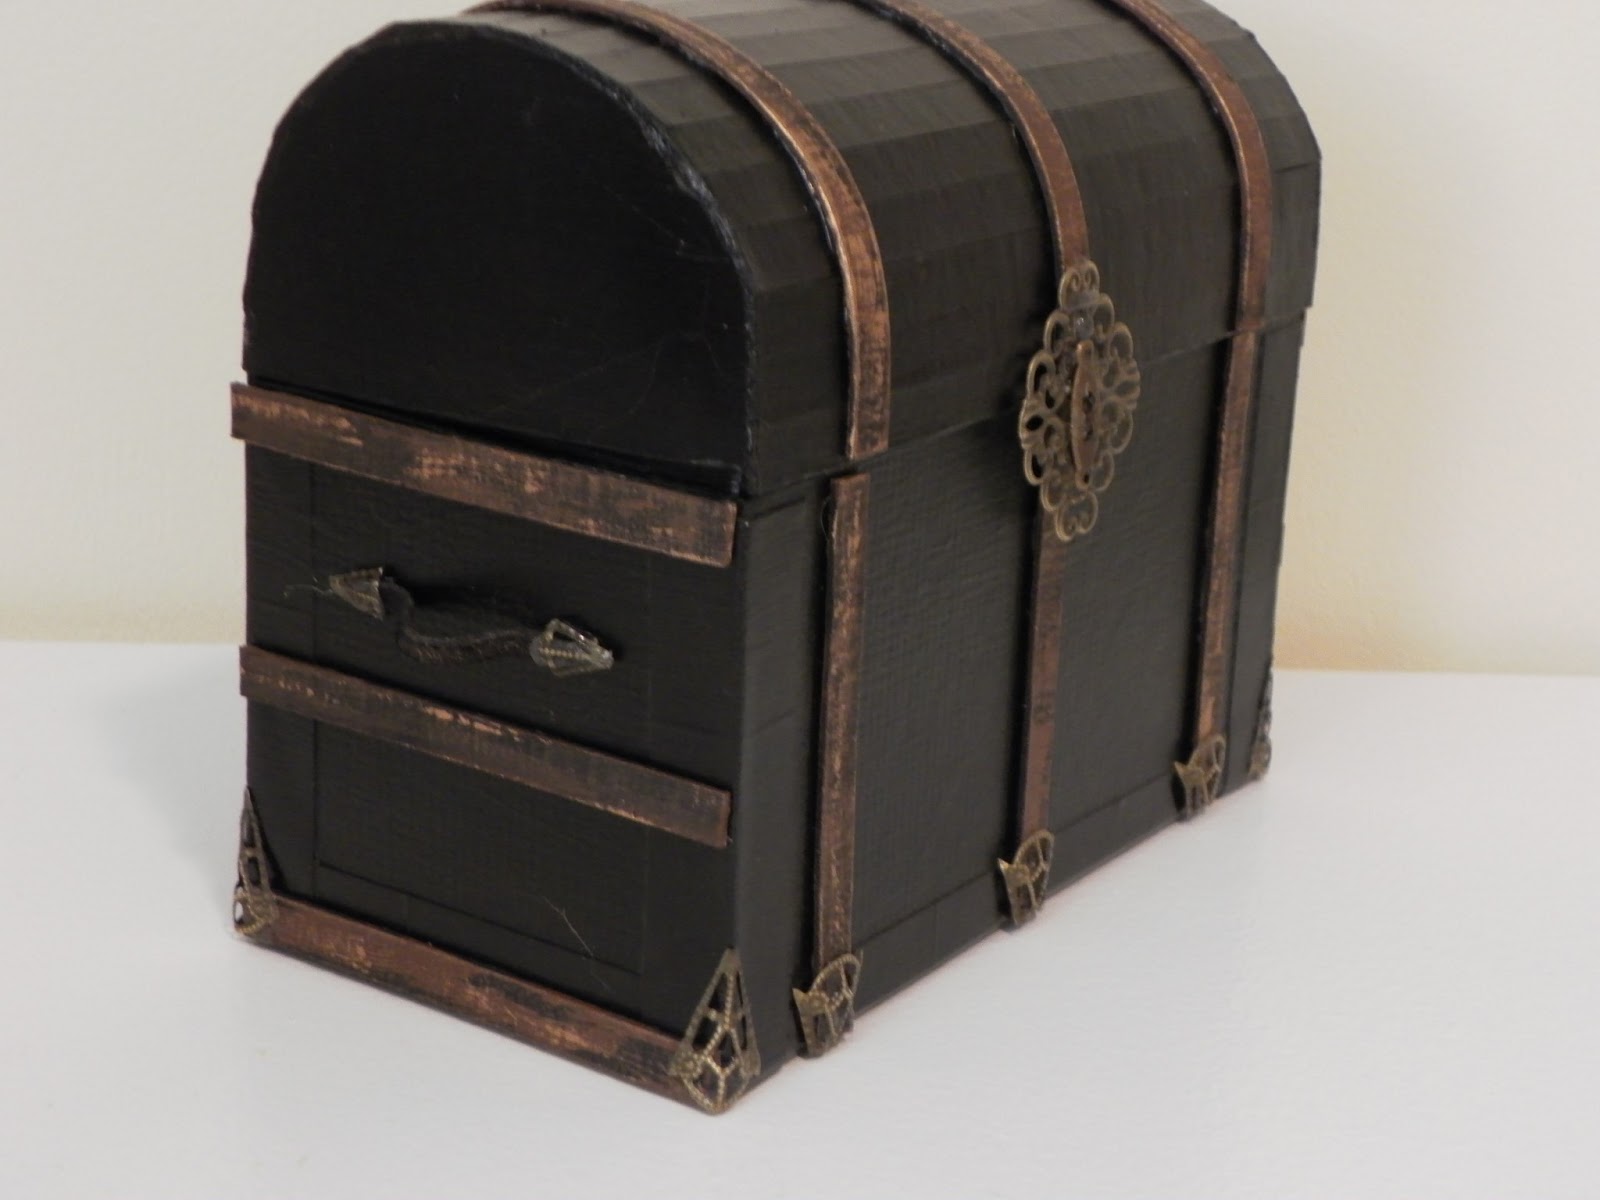
The above picture is of the back of the trunk. I used some mat board to make the bottom of the trunk and used chipboard that I cut little slats in (not all the way thru) for the top of the trunk. It made it so that it was much more bendable. Here's a little tip for you. I have a Fiskers trimmer and I always save my old worn out cutter blade just to cut chipboard with so I don't ruin my new sharper ones. So don't throw away the old blades they can come in handy. I love the way that the top of the trunk looks like little slats and am thinking (when I get time) that a roll top desk sure would be neat like this..... hmmm ideas ideas running through my head.

The inside I wanted to look like some of the ones I've ran across where they have had to reline their trunk with old newspapers and such and so I mod podges some scraps of that type of paper on the inside. And of course I had to add the "guts" as I call them to it. The "guts" referring to the trays that if your so lucky, to find in the old trunks. They used to hold I believe things like their stationary and smaller items and such and then the bottom was where they had their clothing.
Here are some of the miniatures that I made or found in my stash for one side of the "guts". I made some tiny file folders that I grudged up to look old and worn as well as the envelopes and then I made a little ledger book using scraps of the mat board and paper. And then I found an old timey magnifying glass in my stash that seemed to go perfectly with the theme.
On the other side I made a little "journal" from scrap paper and used distress ink on it as well to make it appear old and worn. I had found a teeny tiny little old fashion pen in my stash and painted the tip of it to look like it had been dipped in ink as well as a tiny pair of glasses. I just used some embroidery floss and a button to hold the journal closed.
Then of course I wanted to make it useful in some way. So in the bottom I added a place for pictures.
And not just one mini album but I made 3! Again I used some of the mat board that I had and wanted to make the mini's look like the real old timey scrapbooks. I used kraft paper for the pages inside and inked every single page with vintage photo ink.
I bound each mini with some black embroidery floss. It just looks like something you would of seen back 100 years ago or so. What photos do I plan on putting in this album you ask? Well since I never have gotten around to making myself a family reunion album that I will keep for me, I thought it would be perfect for that and I will add the little black corners to each picture like they used to use to hold the pictures in their albums.
I hope that you enjoyed this post and that it has inspired you to step out of your comfort zone like the video that Fiona did with the miniatures did for me. Here are the links where I got my ideas and inspiration along with the link for Butter B Scraps.
Fiona who is Jennings644 on youtube
https://www.youtube.com/watch?v=OdcbCCKwuFU
Butter B Scraps on Zibbet
http://www.zibbet.com/ButterBeeScraps#
Have a great day everyone!


Holey Moley... that you MADE the steamer trunk was alone made me go..."what??" ...but you went on to make it look so realistic..and the icing on the cake.."photo albums" .. I can only imagine the time it took.. to make the hump of the trunk look so perfectly real.. YOU are amazing !!!! Gee all i did was paint 6 inch cabana stripes on a 9 x 12 foot canvas to make a curtain for my porch...sheshhh I always look forward to what on earth you with dream up next.
ReplyDeleteHey Sis, The original idea wasn't mine I had seen a lady on youtube making a witches chest with miniatures in it and well you know how I love my steamer trunks so I had to try it. It wasn't that hard it just took some time to get my measurments right. I hope that you post what you've been doing so I can look at it and so you can share with everyone else all the pretties you make!
ReplyDeleteRobin, I believe you have out done yourself. Everything is amazing. I keep checking back ever couple of days to see if you have posted anything new. Have you got your craft room changed around with those things from Michaels?
ReplyDeleteGive Zoe a big kiss for me and I hope you are feeling good. Love you!!!
Thanks Brenda! Yeah when Michaels had all of their furniture on mega sale I bought some things and have been redoing the craft/guest room. I'll post some pictures of it later. I hope your feeling better! Zoe and sis and priss need a play date sometime. lol love you!
ReplyDelete