I'm going to let the pictures do the talking so to speak on this post. I don't think that it needs much explaining. I'm not sure what paper pad or pads that I used. But I do believe that it was Recollections flowers on the front and of course I used my bind it all. Other than that I think it will speak for itself.
Well I hope that by now you are giggling or at least got a good laugh out of my belated birthday mini that I gave to a friend of mine. I know I was laughing when I made it.
Have a wonderful day everyone and God Bless!
Robin
Friday, February 28, 2014
Thursday, February 27, 2014
Mini album in an upcycled box...
Hi everyone! Sorry that I've been away for a while but thought that I would play some catch up on things that I've been making. The above picture is an empty box that my ATG tape comes in that I upcycled into a mini album. WARNING: THIS POST IS LOADED WITH PICTURES!
For the paper pad, I used Recollections French Country. The latch for the mini album is from Tim Holtz I believe. I used distress ink on all of the edges along with black and white polka dot washi tape.
The fence on the top of the box is by Martha Stewart and the flowers are from Petaloo. The rooster is a cut out from the paper pad and the canceled postage stamp I'm not sure who that is from.
There are so many moving parts in this mini that it will be almost impossible to show all of them to you in this blog. It has lots of tags, pockets and hidden compartments.
Can you see how the top flap has been opened to reveal a journaling spot and a tag with a place behind to add a picture.
There is more fussy cutting on this page and several tags are tucked in behind the iron gate.
Once the flap is raised it reveals yet another tag for journaling and a hidden tag at the top for pictures.
There is a removable tag behind the "oh la la" sign which has a hidden magnet to hold it shut.
Once you open that flap it reveals more places for pictures and journaling.
There is a secret picture frame in behind the metal number on this page.
it is held on with a magnet and a picture can slide right up thru the top.
When you flip the page up with is what you will see. A couple of tags that pull out and more places for pictures.
The page that the fussy cut rooster is on actually was made from a small coin envelope and is just a flipper page.
As you flip that page you will see an area where tags can be placed and pictures can be added.
This page has lots of tags and flip downs.
The little envelope flips up to discover a place for photos or journaling.
The above page actually will flip up and expose more room for photos.
On this page. You can open the little rooster tag to reveal a spot for journaling about the picture you would add next to it.
There are 3 tags tucked in behind the vintage plums sign. The page will then flip open to the right to expose room for more pictures.
I stamped and colored this rooster. You can add a picture in behind the frame. I just love the feathery type material.
The black hinge had a magnet in it to hold the tags behind it.
This is probably my favorite page. I punched all of the flowers out and used distress ink on them then added some Petaloo flowers and fussy cut the rooster out. There are 2 tags tucked behind the flowers that I could out and inked with Creative Memories white chalk ink to make them look like chalkboards.
This is the last page in the album and it has flips on it just like the previous ones do.
Tags, tags and more tags. The keyhole is actually a cut out from Tim Holtz grunge board. I just added the eyelets to it.
The bottom of the box is where I will be added the date of the pictures that will be in the album.
This was a very labor intense project and if I were to make another one, I wouldn't add as many pages in it because without pictures it is already very full.
Thanks for stopping by everyone and I hope that you have a wonderful day
God Bless,
Robin
For the paper pad, I used Recollections French Country. The latch for the mini album is from Tim Holtz I believe. I used distress ink on all of the edges along with black and white polka dot washi tape.
The fence on the top of the box is by Martha Stewart and the flowers are from Petaloo. The rooster is a cut out from the paper pad and the canceled postage stamp I'm not sure who that is from.
There are so many moving parts in this mini that it will be almost impossible to show all of them to you in this blog. It has lots of tags, pockets and hidden compartments.
Can you see how the top flap has been opened to reveal a journaling spot and a tag with a place behind to add a picture.
There is more fussy cutting on this page and several tags are tucked in behind the iron gate.
Once the flap is raised it reveals yet another tag for journaling and a hidden tag at the top for pictures.
There is a removable tag behind the "oh la la" sign which has a hidden magnet to hold it shut.
Once you open that flap it reveals more places for pictures and journaling.
There is a secret picture frame in behind the metal number on this page.
it is held on with a magnet and a picture can slide right up thru the top.
When you flip the page up with is what you will see. A couple of tags that pull out and more places for pictures.
The page that the fussy cut rooster is on actually was made from a small coin envelope and is just a flipper page.
As you flip that page you will see an area where tags can be placed and pictures can be added.
This page has lots of tags and flip downs.
The little envelope flips up to discover a place for photos or journaling.
The above page actually will flip up and expose more room for photos.
On this page. You can open the little rooster tag to reveal a spot for journaling about the picture you would add next to it.
There are 3 tags tucked in behind the vintage plums sign. The page will then flip open to the right to expose room for more pictures.
I stamped and colored this rooster. You can add a picture in behind the frame. I just love the feathery type material.
The black hinge had a magnet in it to hold the tags behind it.
This is probably my favorite page. I punched all of the flowers out and used distress ink on them then added some Petaloo flowers and fussy cut the rooster out. There are 2 tags tucked behind the flowers that I could out and inked with Creative Memories white chalk ink to make them look like chalkboards.
This is the last page in the album and it has flips on it just like the previous ones do.
Tags, tags and more tags. The keyhole is actually a cut out from Tim Holtz grunge board. I just added the eyelets to it.
The bottom of the box is where I will be added the date of the pictures that will be in the album.
This was a very labor intense project and if I were to make another one, I wouldn't add as many pages in it because without pictures it is already very full.
Thanks for stopping by everyone and I hope that you have a wonderful day
God Bless,
Robin
Tuesday, December 17, 2013
Christmas decorations completed for 2013
Hi everyone! I'm sorry about posting the finished decorations so late. They have been completed for a week or so. I didn't get to do all of my ideas that I had in my head this year so I had to prioritize what was the most important and finish what I had already started. I'll be sure to get started sooner next year and that way Christmas want creep up on me like it did this year. I'm not sure what I was thinking. Normally I'm really on the ball when it comes to anything to do with Christmas. Maybe it was the fact that we had a shorter period between Thanksgiving and Christmas or something another. Not sure what it was but I'm still really happy with all that I did get done. So here are the final results.
Ok well remember in my last post I said that I was going to flank either side of the fireplace with gumball topiaries? Well here they are....you all have no idea how much time those consumed before Suzie told me that I could put the air dry clay in the oven to move along the process MUCH quicker. I would cut and roll sheet after cookie sheet of balls thinking that surely I would have enough...only to wait 3 days until they were dried, painted and rolled in glitter that I needed 4 times more to even get a good start on things. But they were so worth it. I really didn't expect them to weigh as much as they do though. I guess I thought that air dry clay would be,.....well lighter, more airy. I bought plain terra cotta pots and painted them and then made homemade texture paste to add the "icing" to the rim.
Even though these topiaries put me way off schedule. I would still do it all over again because they make me happy and smile and look so yummy.
Here is a close up of the "icing" pots that the topiaries are in.
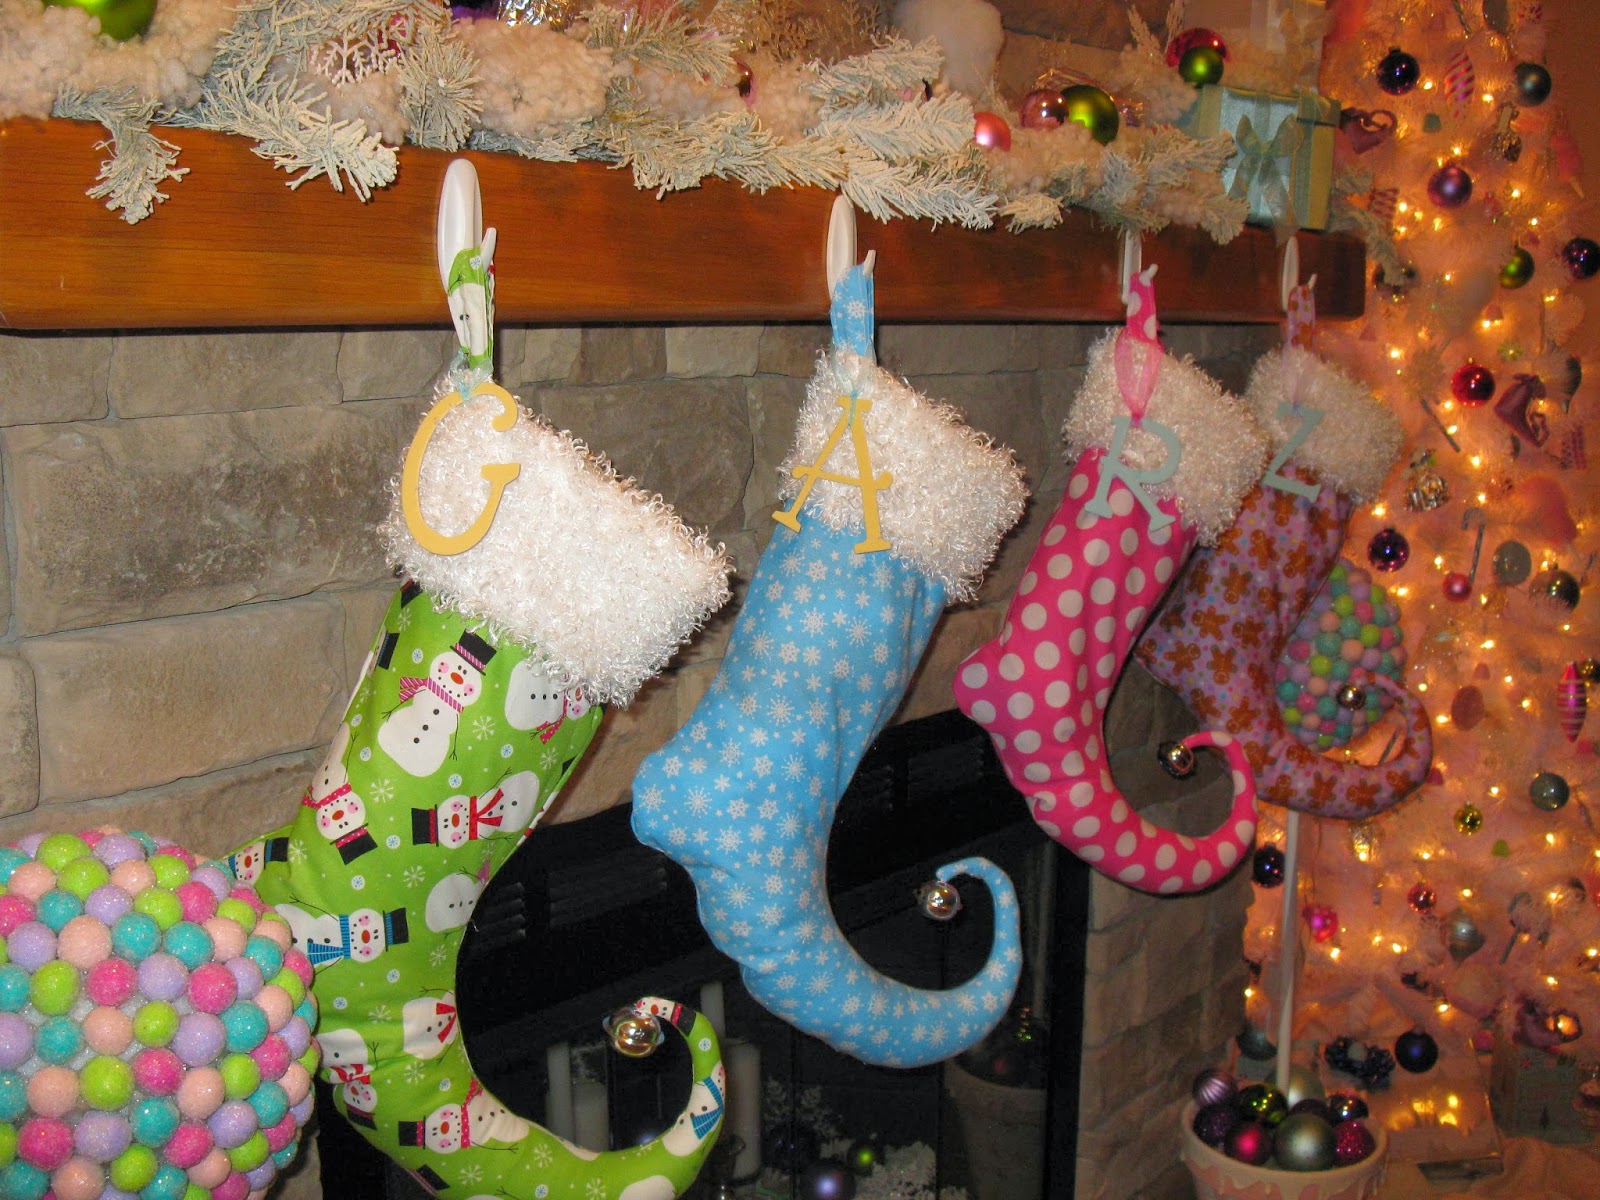
The stockings make me giggle. I absolutely love them! I had a vision for the fireplace and these were one of the top priorities. I wasn't able to find 4 different Christmas pattern fabrics at Hobby Lobby but think that it all came together even with the one that's polka dotted. It still goes with the theme I think. I haven't had a stocking since I was a little girl. Zoe even got a stocking....of course.
This is the wreath that I made this year. I probably wouldn't of bothered with making it but had already bought the ornaments to put on it. It was just a manner of taking the old things off of this wreath and adding the new candy things and balls. Most of which I found at $ Tree.
This wouldn't of happened this year either had I known that I wouldn't be able to go all out with the candy theme outside like I had in mind. But this was another project that I had started most of the things to make it so I wanted to go ahead and go thru with it. Next year I'll just be sure to start extra early. We've had lots of rain since I put this out and so far so good. It's holding up well. Tonight we are getting some really heavy winds so I'll have to get back with you on how it does with that. I may be chasing lollipops and gumdrops tomorrow.
I redid this trunk over the summer and plan on planting flowers in it during the summer months. It wasn't a trunk that I could really fully refurbish like my other trunks. My brother in law found it for me because he knows how much I love to redo them. I refused to let this one go to the dump...I saw it's potential.
Ok well remember in my last post I said that I was going to flank either side of the fireplace with gumball topiaries? Well here they are....you all have no idea how much time those consumed before Suzie told me that I could put the air dry clay in the oven to move along the process MUCH quicker. I would cut and roll sheet after cookie sheet of balls thinking that surely I would have enough...only to wait 3 days until they were dried, painted and rolled in glitter that I needed 4 times more to even get a good start on things. But they were so worth it. I really didn't expect them to weigh as much as they do though. I guess I thought that air dry clay would be,.....well lighter, more airy. I bought plain terra cotta pots and painted them and then made homemade texture paste to add the "icing" to the rim.
Even though these topiaries put me way off schedule. I would still do it all over again because they make me happy and smile and look so yummy.
Here is a close up of the "icing" pots that the topiaries are in.
The stockings make me giggle. I absolutely love them! I had a vision for the fireplace and these were one of the top priorities. I wasn't able to find 4 different Christmas pattern fabrics at Hobby Lobby but think that it all came together even with the one that's polka dotted. It still goes with the theme I think. I haven't had a stocking since I was a little girl. Zoe even got a stocking....of course.
This is the wreath that I made this year. I probably wouldn't of bothered with making it but had already bought the ornaments to put on it. It was just a manner of taking the old things off of this wreath and adding the new candy things and balls. Most of which I found at $ Tree.
This wouldn't of happened this year either had I known that I wouldn't be able to go all out with the candy theme outside like I had in mind. But this was another project that I had started most of the things to make it so I wanted to go ahead and go thru with it. Next year I'll just be sure to start extra early. We've had lots of rain since I put this out and so far so good. It's holding up well. Tonight we are getting some really heavy winds so I'll have to get back with you on how it does with that. I may be chasing lollipops and gumdrops tomorrow.
I redid this trunk over the summer and plan on planting flowers in it during the summer months. It wasn't a trunk that I could really fully refurbish like my other trunks. My brother in law found it for me because he knows how much I love to redo them. I refused to let this one go to the dump...I saw it's potential.
I hope that everyone has a very Merry Christmas and the happiest of New Years. Thank each and every one of you for visiting my blog this past year. I love to read comments after you've browsed my blog. (hint hint) Thank you all and I'll see you next year.
Subscribe to:
Posts (Atom)