Friday, October 5, 2012

Is it a Stork or is it a Goose? Baby gift....

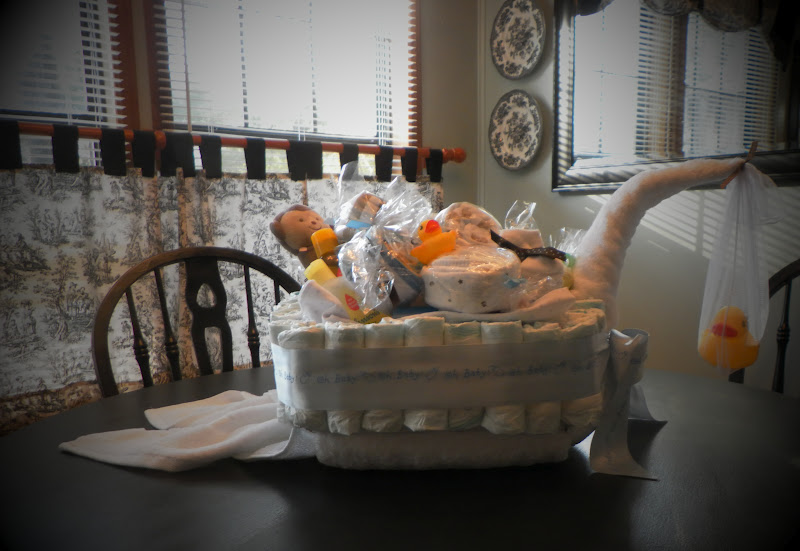
 Well which is it? Neither way it doesn't really matter I don't suppose cause it helped me use up more diapers!! This was actually my first idea when I sat out to get a gift and then it just kind of evolved due to the amount of diapers I bought. I had made a towel swan, goose, stork whatever you want to call it this summer and placed it on the guest bed when my brother and his yougest son came to visit and I thought it would be neat to make one similar to that and have a basket on its back made of diapers to hold extra little gifties so this is the outcome of that thought.
As you can see I placed all of the baby clothes candies inside the basket as well. Hope that this sparks some creative imaginations out there and if you do something similar will you please send me pictures so I can see them as well.
Stick around cause those diapers still aren't used up yet....There is one more post to come for the baby gift ideas.

Diaper baby bassinet and "Baby clothes candy"...

 I'm sure that you all have seen one of these by now cause I found a picture of it on Pinterest as well. I'm not sure how many diapers it took to make it but it helped lighten the diaper box a little.
 After making this I was looking at how the back side looked and thought how easy and sweet it would be to turn the baby carriage into looking like a little covered wagon. All you would have to do is use a red or blue bandanna and for the wheels you could always cut out a circle and draw lines on it to look like spokes and use double sided tape. I'll have to keep that in mind if I ever am in need of another boy baby shower gift.
I lost a few of my clothes candies when I was carrying them to the kitchen to take a picture but I figured that this would give you an idea and you didn't have to see how many I made just what they looked like when they were finished. I saw this on Pinterest as well. It's just onsies, wash clothes and baby bibs rolled up. Super simple as well. The only thing that I found the 90% of the things I made was that it would of been nice to had another set of hands to help me hold some things.
Come on back cause I'm not done with the baby stuff yet...I still have more diapers to use up....
p.s. I meant to tell you that on the back of each one of the little "candies" I punched out a round tag that tells the expectant mom what exactly is inside.

Diaper Motorcycle....

 Hi everyone! I wanted to share with you some things that I've been making with diapers. Yes, I had to stop my other projects that I have going on in order to have something for the upcoming baby shower. So first off there will be several posts for ways that I was able to use all 112 diapers! Yes you heard me right and YES I did learn a lesson on NEVER EVER buying that many diapers again EVER for a baby shower gift. But now that it's all done and over with it sure is fun to look at everything.
 I saw this idea on Pinterest and just had to make one! Several things were running thru my mind as I was making it and I thought about titling my post as one of the following:
Soft Tail anyone?
Low Rider?
Easy Rider?
Monkeying around....
But as you can see I opted for none of those cause well.....think about it.
It was fun to make though and super super simple!
Now stick around cause I have more posts to come. Remember I had 112 diapers to do something with and this was only about 30 of them.

Tuesday, October 2, 2012

Revamping all of my outdoor pillows...

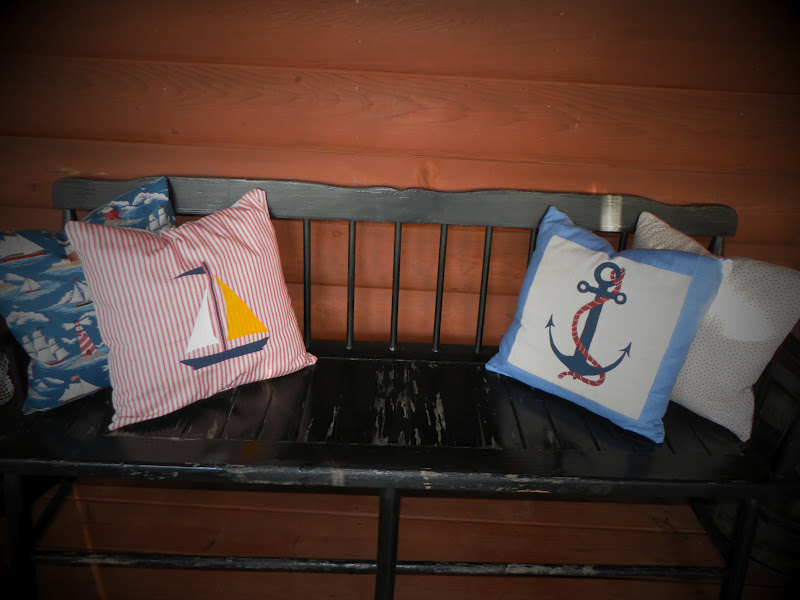
 Hi all! So here is a little bit of what I've been doing lately. Since I had decided to use the nautical theme on my front deck I just jumped in and got started to make that happen and here your going to get so see part of the results. So far....I took my old rocker cushions and recovered those as you can see below....
 I added a little more foam to them cause they were starting to get a little worn out where you sit at. Then I painted the life ring on as well as the rope but I used some white quilt seam binding to make the little straps that supposedly holds that rope to the life ring. I wanted a 3D effect of some  kind. I made 2 of these for our front deck.
Then I went on to recovering the other pillows that were on my bench and once again I used the nautical theme. The sailboat and anchor are both hand painted and then heat set so they will stay on once they are washed. My next sewing project for out there is to make new cushions for the chairs that we use when the weather is nice outside. Then hopefully the rainy weather will be passed and I'll be able to restain my top and both of the rocking chairs. My bench needs a good touch up as well with some paint so I'll need to get that done.
Have a good night everyone! I'll be back with more as soon as I can get them done.

Friday, September 28, 2012

Blue Jean Apron

Hey everyone! Hope that you all are having a good day. I've been busy busy busy here lately and thought that I'd show you one of the maaaany things that I've been working on. I took a pair of my son's jeans that wouldn't fit him anymore and some of my leftover scraps from the vintage market cart project and turned it into this! When you put it on you can't help but to smile and want to priss around in it. Even my mom did when I put it on her! I have 3 more pair waiting in the wings to be all dolled up. But I have been working on another project that needed to get done before the weather got so bad and I'll be sharing that project with you once its all completed so be sure to come back soon and check that out.
p.s. Sorry I don't own a dress form to display my cute little apron on so I had to go with what I had and use my card display. (its ok you all can giggle about it but it worked!)

Wednesday, September 19, 2012

Vintage shopping cart gets a facelift....

 Hi everyone! Remember this little shopping cart that I was so fortunate to run across while out junkin' a couple of weekends ago? Well I have been wanting one of these forever and was thrilled when this was sitting there waiting on me to take her home. So I've been busy making her all pretty and frilly. I was so excited to show the end result with you all that I snapped the pictures before I even ironed it so overlook all of the wrinkles please.
Look how cute it turned out!!! I want to find me an vintage costume brooch to add to the front of her because she's been asking for a little bling. (yes I talk to her, matter of fact the more I embellished and added to her the more her personality came together)
 This back pocket is something that I had bought several years ago. It is suppose to be attached to a baby crib to put diapers or whatever in but will be the handiest thing ever for small things, bottled water, snacks ect.
 I added a pocket on the inside as well that would be large enough to put small things in as well and added a little bit of velcro to keep it closed
 The old lace curtains and fabric roses make me smile!
 Then I ran across this little wire basket that was originally used to put golf balls in. I made a little liner for it as well and it will sit just as you see it in the picture to put breakables in and if I find that I need more room in the cart then I can always hang the smaller basket off of the handle of the cart and tie it off with a ribbon. Yes I'm thinking ahead.....that might just save me a trip back to the car to unload and possibly miss a great find!
Here is the basket out of the cart. Please remember that both liners need a good ironing. On top of that....remember that I've never claimed to be a great seamstress but I do well enough to get by. Not bad for a girl who didn't even know how to thread a sewing machine until she got married much less sew! Thank you Mr. Candy Creek for teaching me how to sew and for buying me my first machine!
Well I'm off to heat my iron up and have already started working on another project to share with everyone so come on back soon. Hope that everyone has a good day!

Friday, September 14, 2012

Pantry door change up....

 Hi everyone, I hope that you are all having a good day. I wanted to share with you a remedy that I came up with for something that has been driving me NUTTY for years. I am constantly having to scrub my pantry door with Windex or whatever to get greasy fingerprints off and about every 3 weeks then I've had to go touch of the paint around the handle. I've even gotten to where I would use exterior trim paint thinking that would surely be tougher paint and would hold up....not so much as much as I was scrubbing it. So even though I will still be disinfecting the area around the handle at least maybe this will help it not look so horrible and be an eye sore for me. Note in the before picture I had already taped off around the handle to paint it white yet once again. NOT this time though...I changed my pantry door from this to.....
THIS!!!! I'm so happy with it. I wanted to add a little something special to it once it was painted black so that it didn't look like a black hole and deliberately didn't place the PANTRY writing where the handle is so that just in case I need to do some touch up then I wouldn't have to worry about repainting the wording as well. I like how it turned out...what do you all think??
Hope that you all have a good day.