Saturday, December 3, 2011

Winter Artwork...

Ok well this project wasn't exactly something that was planned...it just kind of happened. If you all remember back many months ago I decided to see if I could paint some "contemporary cheap artwork" for my newly redecorated living room. Needless to say the more I looked at those paintings the more I hated them! So I was going to take them down and hang some pictures that I had ran across that was tucked away in my stash but then I got to thinking...since I was going to more than likely toss these 3 canvas's anyway why not try to make something "wintery" out of them. I realized in a hurry that I'm NOT an artist but what was it gonna hurt to try? So Mr. Candy Creek helped me decide what kind of folk art tree to paint and got to it. Then of course since our "theme" this year is winter wonderland it just had to have some snowflakes and why not make them 3D ones? I have to admit...they look much better than they did before and will work just fine for us through Christmas.

Coffee Filter Wreath..

Here is something else that I picked up off of Pinterest this year. I saw it and just had to make one. It's another simple and cheap decoration to make however it is a bit time consuming but was fun to make. Here is the list of supplies that you'll need:
Straw or styrofoam wreath
2 packs of 160 coffee filters
hot glue gun
hot glue
1 piece of floral wire
First off use your long piece of floral wire and wrap it around the top of the wreath and make a little loop so that you'll have a way to hang your wreath once it's complete. Then I use several of the coffee filters to wrap around the entire straw wreath so that you couldn't see the base of it. Now for the time consuming part....take an fold each coffee filter in half then fold in a triangle 2 more times. Once that's done twist the pointy end of the coffee filter about 3/4 inch up then snip the end off leaving only just a little of the twisted end so that it want come untwisted. Take and open up the fluffy end of the coffee filter. It will kind of remind you of a rose once it's been fluffed up. When I started gluing them on the wreath I just worked in a circle being sure to fill in as tightly as I could. That's it...just a little time and patience. Have fun and Happy Crafting!

Snow covered candle holders...

Hi everyone. Here is a cheap and simple little decorating idea. I bought everything at Dollar Tree and just love the way that it turned out. I had gotten this idea from seeing a post on Pinterest where they used empty wine bottles.
 First I just simply sprayed the glass containers with spray glue. I found that it was easier to work in small sections at a time and a spray box is a must of course.

Then I simply rolled my vases in epsom salt. If you have a vase that has a lip on it or a decorative edge where you can't roll it evenly then just pour the epsom salt on your vase and pat down with your hand. Be sure that you have some wax paper laid down so that you can keep reusing the salt and so that the glue doesn't get on your counter. The only thing that I didn't figure out is how to keep the glue off of your hands. It took me longer to get my hands cleaned back up than it did to cover all of the vases. It took half a bottle of acetone nail polish remover to get it all off. It was all worth it though. Happy Crafting!

Wednesday, November 23, 2011

Happy Thanksgiving 2011 Everyone!

I'm sure that like everyone else today we are getting ready for the big FEAST tomorrow. So I thought I'd share with you some pictures my husband took of me today making our pecan pie. My mom is making the pumpkin pies but since I've recently learned how to make homemade pies I just had to put my newly learned skills to good use and plus...what's a good ole southern feast without pecan pie?
 Here I am placing the leaves out of leftover dough to make a pretty decorative edge. I think if your gonna put that much love and attention into something then you should try to make it pretty too. Plus it was fun!


Pie is all done....ohhh what I wouldn't give to be able to go ahead and slice into this about right now. The house is smelling so good. I have to say thanks to Suzie again for not only teaching me to make pies but also for the recipe. This was her mothers pecan pie recipe and I just pray that I have done them both proud in making it. I hope that everyone has a very blessed Thanksgiving this year. I know that there are so many things that I'm so grateful and blessed for in my life and one of  those is you all for continuing to come back and visit my blog to see what all this little hillbilly has been up to. May God Bless each and every one of you.

Chunky Mini Album Completed....

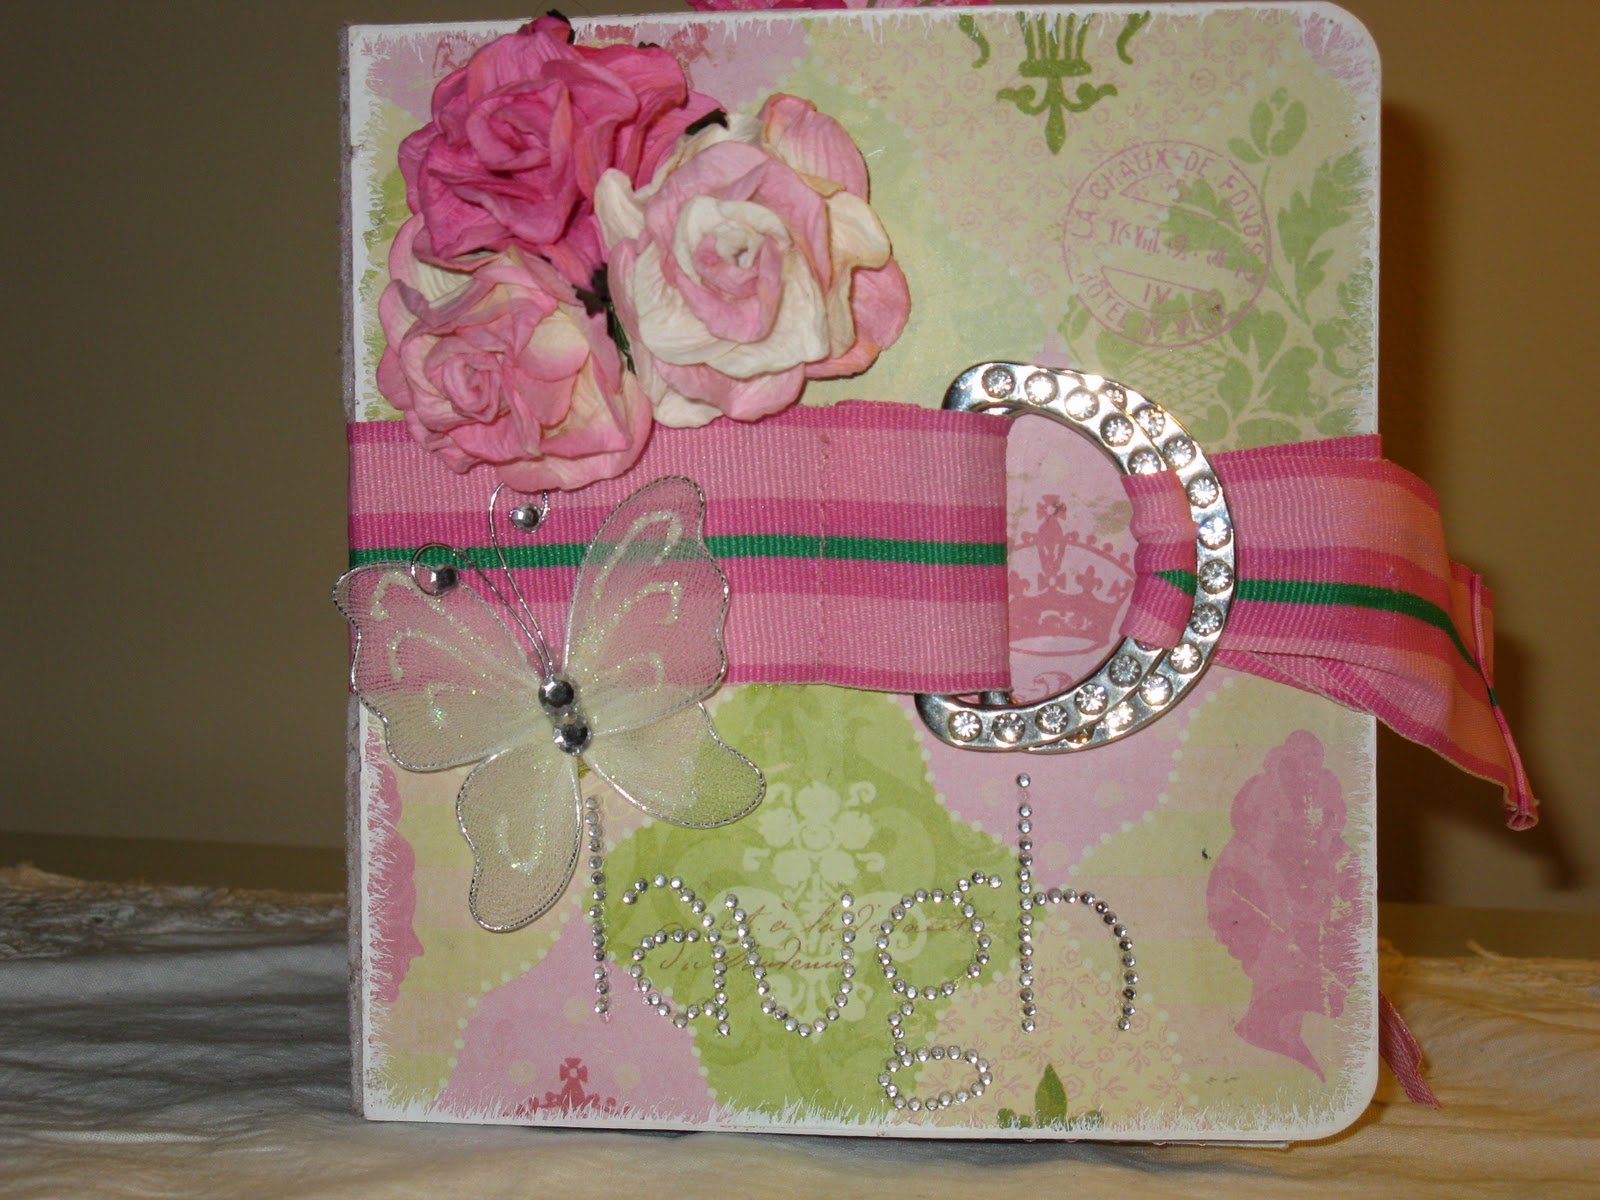
Happy Thanksgiving Eve everyone! I thought that while I was taking a break from cooking that I'd share with you the completed mini album that I had shown a sneak peak of waaaay back in September. I finally finished it and it's on it's way to Oklahoma right now to rest in the hands of my dear sweet sis Suzie. This album was so much fun. I just hate that it took me so long to get it done for her..
 I had picked up some ribbon belts at the thrift store back about a year ago and then picked up some more about a month ago just so that I could use them on these little albums. I was so thrilled to get to use it as my closure and as you can see...this mini shouldn't really be called a mini because it's soooo fat! uhhh scratch that...because it's so chunky..that sounds so much better especially at this time of year huh?
 When I was making this album I knew that it was going to be really "chunky" but had in mind that instead of laying flat somewhere that it could sit up just like it is in the pictures and you could get a better view of the front cover.
 I used white sticky back felt and sprayed it with some glimmer mist and let it dry good over night while the backing was still attached so that the binding would match my scrapbook paper I picked out for the front and back covers...the felt holds really well and is flexible. I saw Laura at Following the Paper Trail use sticky back canvas but couldn't find any in my area but found that the sticky back felt worked just fine, is inkable or mistable and I think it kind of gives it another layer of texture that otherwise would of been ho hum. It kind of gives you something you can pet while looking at the album.
If I can remember correctly the binding side is about 4" thick! It's kind of like me...about as broad as it is tall. Hence is another reason I don't like to say it's fat.....just extra extra chunky!
I don't have a clue as to what show I saw Laura doing this binding method using the sticky back canvas and I'm sorry about that. But you can click on her link over on the right hand side of my page and scroll through her blog and find it. I'm sure that you'll come up with loads of other great ideas as well because she's great and so creative. Enjoy Suzie...I hope that you get as much pleasure out of looking at it as I did making this for you.

Tuesday, November 22, 2011

Shabby Chic Bedroom Makeover....

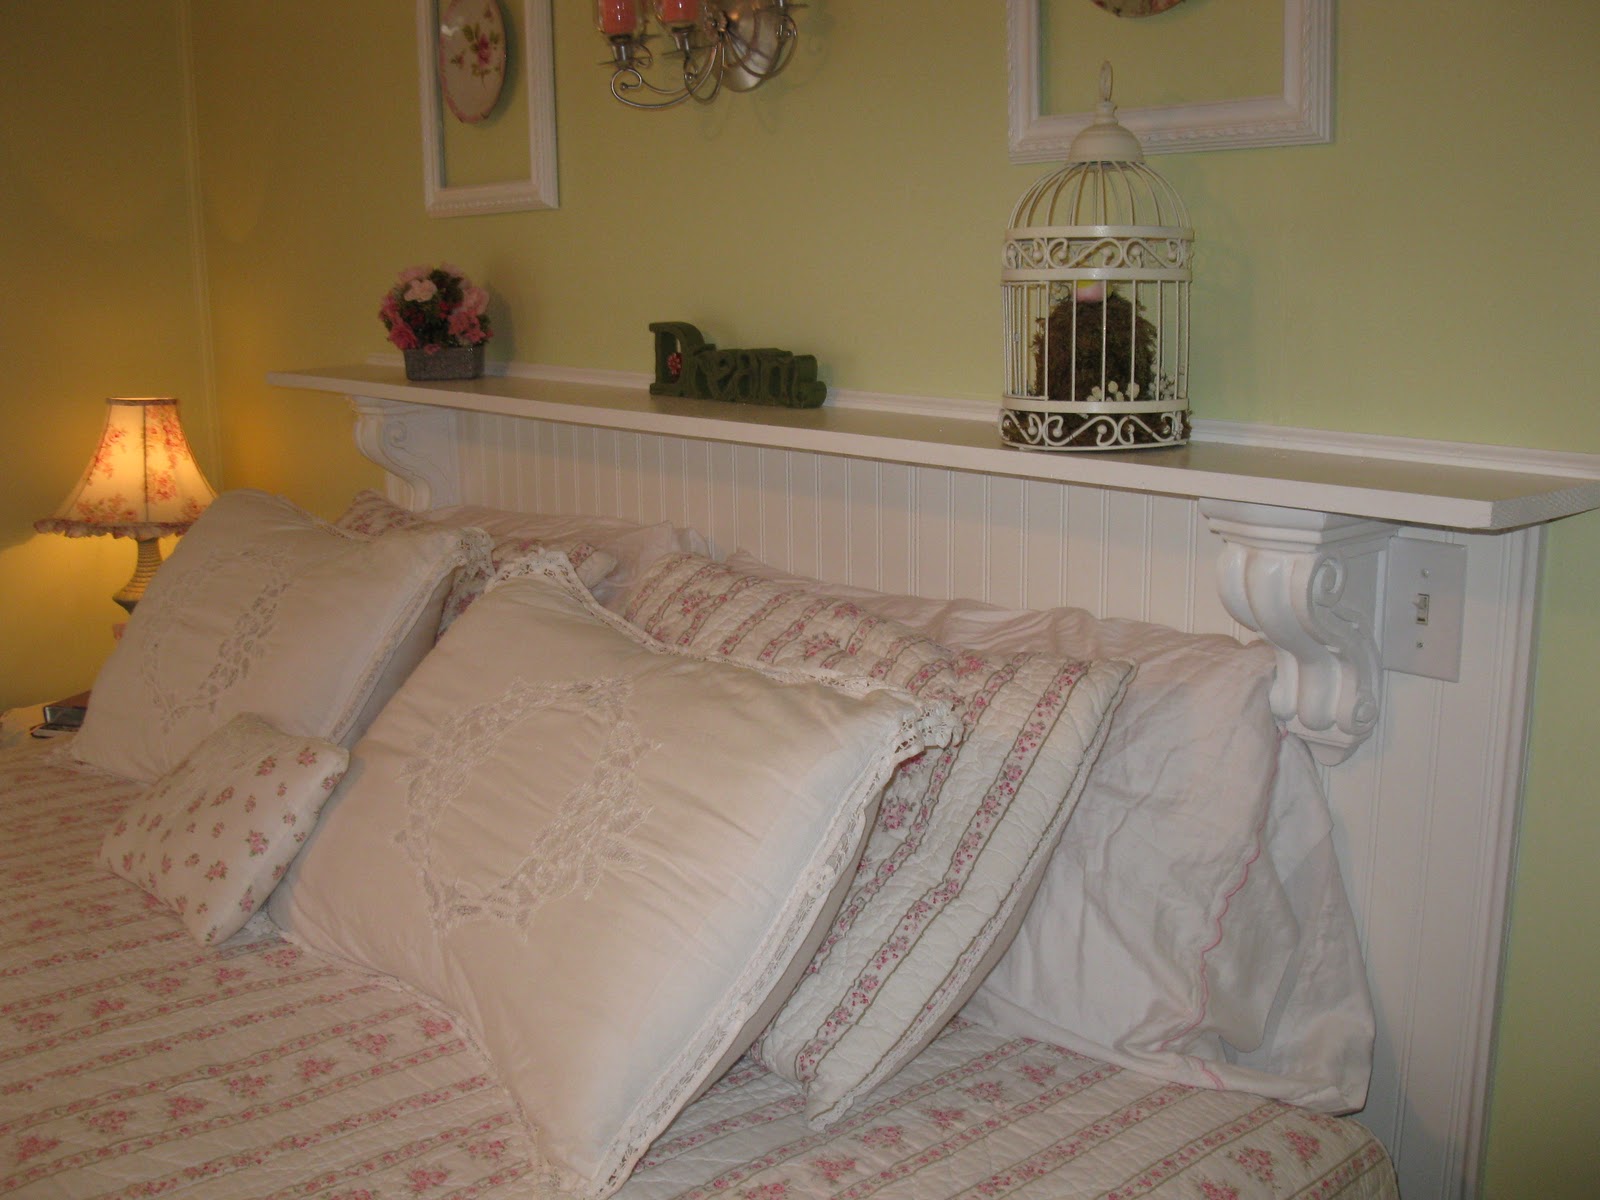
 Hi all...well what started out as my hubby and I KNOWING that we needed a new mattress set turned into me redoing the entire bedroom. Now although I had planned on doing this soon anyway, I really hadn't planned on doing it as soon as my husband and I went to buy a new mattress. See what happened was we didn't want a conventional inner spring mattress, we had done our research and had decided on an air bed. So since you can't use a regular headboard and footboard with an adjustable air bed we decided we would just make our own. So with my husbands carpenter skills and my ideas this is what we came up with. Then of course I just couldn't bare to paint that pretty new headboard and not paint the walls as well and then of course I couldn't paint the walls and not just go ahead and paint all the trim and doors as well since I was going to have to do that anyway eventually. And thus, the bedroom makeover began. I would give anything if I could find pictures of my bedroom before but I was so wrapped up in what exactly I wanted to do that I didn't stop to take any pictures of what the bedroom looked like before. But our trim was dark stain just like it was in the living room so that in itself is a lot of work. But in the end it has all been so worth it and we love it now. Even though I still have things to do AFTER the holidays such as painting all the furniture white and redoing my stack of suitcases. But that HAS to wait...seriously!
 Here is a better view of our headboard. We used the beadboard paneling for the center section and some gorgeous corbels that Suzie and Don had brought me back last summer. This headboard just worked out so perfectly for us and we were both so pleased with ourselves that we keep stopping and admiring it.

 See what I mean about the dark furniture? Now don't you think that painting it white and putting new knobs on will be a welcomed change? I look forward to getting that done in the new year.


Here is the stack of suitcases that I'll be redoing in the new year as well...I already have ideas for these as well. I have my husband so excited that he even said that he's gonna spring for new carpet in the bedrooms this spring as well! WOW! I should of redone the bedroom a long time ago because I've always hated these dark carpets.
Have a good night everyone....I'll be dreaming of sugarplums shortly in our new room.

Sunday, October 23, 2011

Time for BLING!....

Hey everyone. I wish that I had taken a before picture of this little clock but was so excited to paint it and bling it that I forgot too. It was originally just a plain old brown cheap clock that I had painted pink and then dry brushed with a little white to accent the highlights on it. Well NOW it got a fresh coat of metallic silver and some added bling! I'm in love with it now! Its amazing what a can of spray paint and a few loose rhinestones can do huh?
Have a great day everyone!