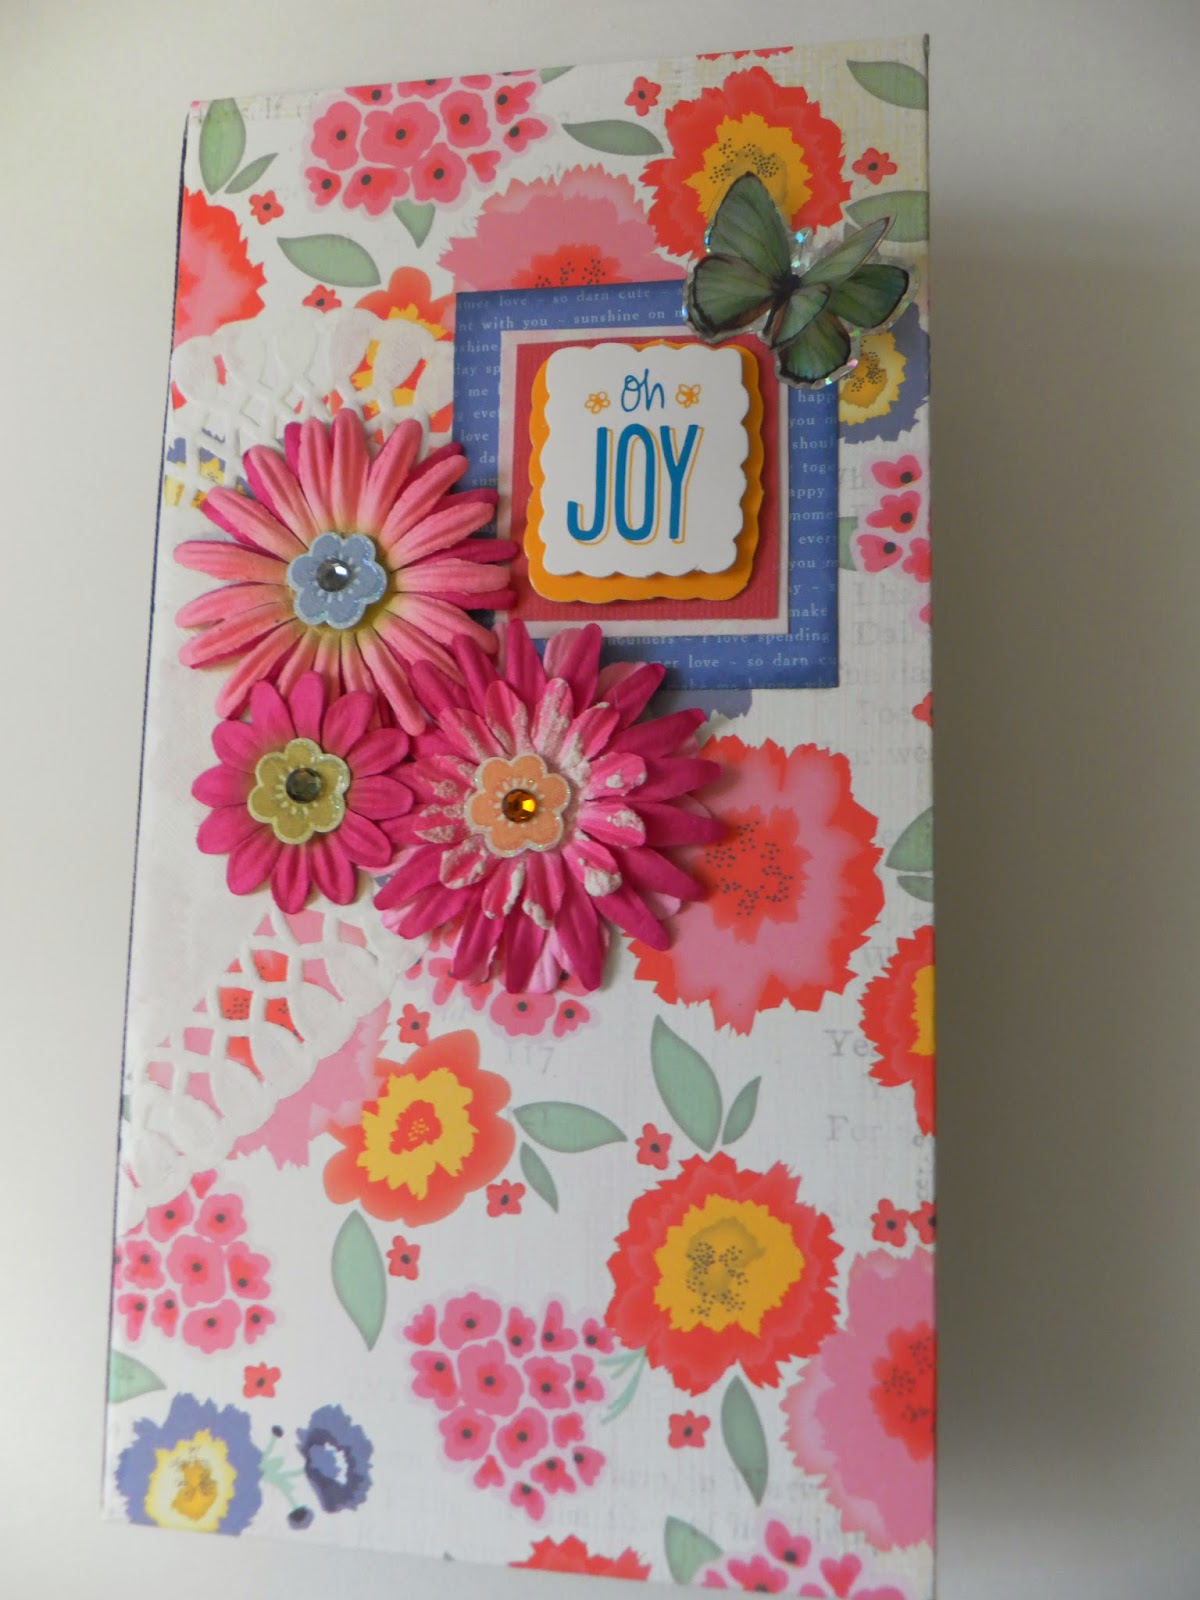
I have been doing something a little different lately. ATC's (Artist Trading Cards) but I put my spin on them. Now micro mini albums aren't anything new for me. Matter of fact the very first handmade album that I made was a micro mini that came from me becoming bored with doing 12 x 12 layouts way back in 1999-2000. However, I haven't been making these little ATC's long. Matter of fact the one in the above picture is only my second one that I've ever made. The first one I had forgotten to take a picture of and was totally different from this one but was still interactive except it had a gate fold interactive back. I will walk you thru this one and have included a picture tutorial so you should be able to follow along and make one for yourself rather easily.
The insides can be decorated in any manner that you wish and so for this one, I decided to add a pocket on the inside cover and placed a couple of little tags. Then on the opposite side I have a little hidden spot which is under the pig picture.
I didn't add this in the tutorial down below because it's quite simple just using a small paper hinge and magnets.
When you raise the entire pig page up (which in the tutorial I refer to this as simple "Flip Up"). I decided to use my file folder punch to make tiny little folders with pockets on not only just the "Flip Up" section but also the "Flip Side" section.
Inside the little file folders I wrote several quotes that I love, but you could add anything you would like inside those little folders. Say for example, a grandmother might want to write their grand children's name on a folder with their birthday on the outside for ease of remembering and on the inside they might add things that they have heard that child say they love, or favorite color, clothes size etc.
In the above picture you are looking at the inside of the "Flip Side" page with a simple butterfly print on it. And a bird print on the "Flip Down" page.
Here you can see it all opened up. The only picture that I did forget to take was one of the backside that shows the little section to put your ATC information. I notched out the top on the back and added an eyelet and some ribbon so it would be easier to pull out. Now below you will find the picture tutorial.
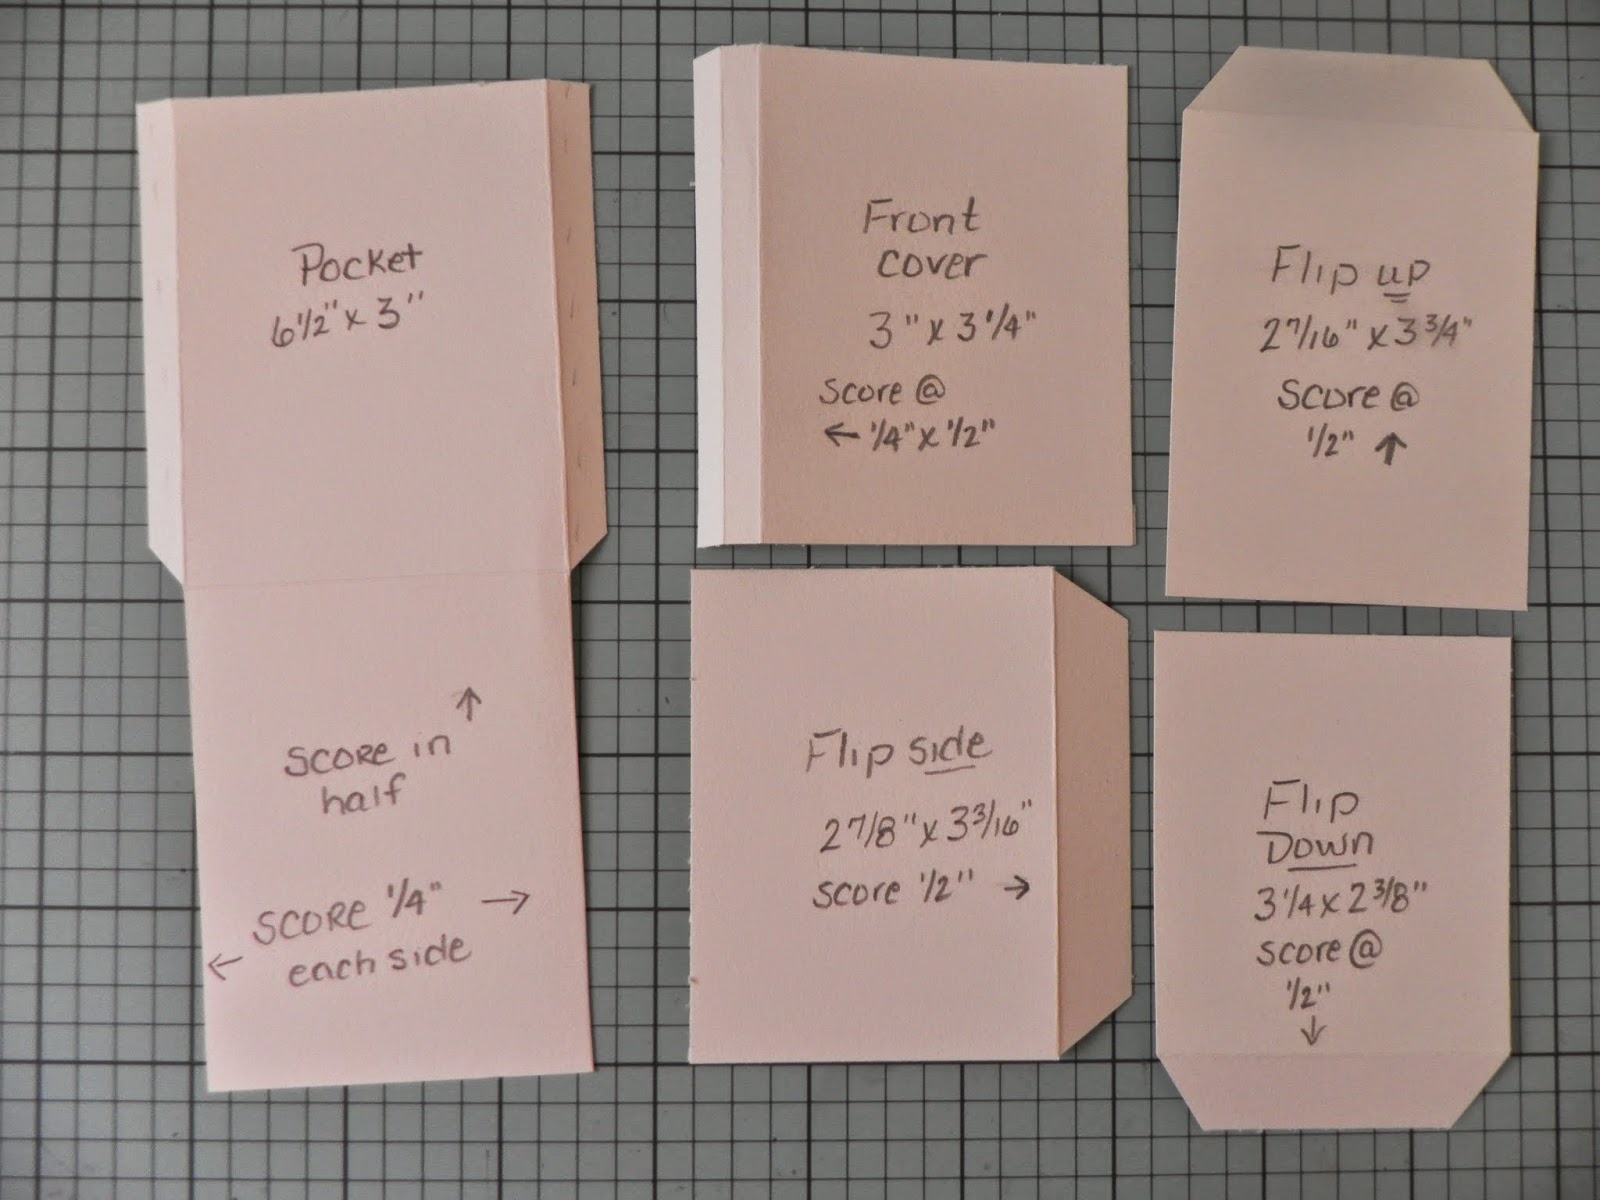
Cut and score your base as shown above. Please click twice on the pictures for an even larger view.
Now go ahead and do your cutting. I placed each section back in the same spot to take the pictures so it would be easier for you to follow. Please note the little notch that I forgot to cut on the pocket. You will see this in the next picture with the adhesive.
Place your double sided tape ONLY on the areas shown...please see the next picture because on the front cover it needs to go front and back as shown in the last picture.
As far as putting it together. Start with your pocket page and your front cover. Before folding the pocket page and sealing shut. First be sure to use your hole punch and only going half way down in the punch snip a little piece out so that your pull will be easier seen. Then take the tape off of the backside ONLY of the front cover and adhere it to the left side of your pocket. Then go ahead and peel off the rest of your tape and seal your pocket up. Now you have a little booklet with a pocket in the back. Next step is super simple. Open your little "booklet" up and everything else will be happening on the right hand side by installing the flip up, flip side and flip down in there appropriate spots. If you will refer either back up to the pictures that I showed previously or look at the pictures below you will see with the pages decorated. I named the pages very generic just for this purpose.
In this above picture you will see the inside front cover on your left and the inside of the flip up page, the front side of the flip side page.
In the above picture you are looking at once again the inside of the front cover, part of the inside of the flip up page, the inside of the flip side page and the front side of the flip down page.
Now you will see all of the pages open. I couldn't get the entire thing in the picture, but you can still see part of the flip up page at the top of the page.
If you do happen to have any questions please let me know. For your pattern papers, just cut each one 1/8" smaller than the page fronts.
Thanks so much for stopping by and I hope that you enjoyed the tutorial and make one for yourself. If you haven't already subscribed to my blog please do so for in the upcoming months, I will be adding many more items to share with you.
See you soon!
Thursday, September 18, 2014
Folio Mini Albums Galore!
Hi everyone! I thought that I'd share some little folio mini albums that I've been making. I followed a tutorial from Ginger at My Sisters Scrapper. You will be able to find her link over on the right hand side of the page if you would like to make one yourself. This first one with the beach theme was made for my best friend Suzie who's blog is also on the right hand side of the page under Our Happy Shack. These are so fun and easy to make and can be as decorative or simple as you chose.
I really enjoyed getting to personalize this one!
I did alter the original tutorial by making a pocket that was 1/4" thick to accommodate the little photo booklet.
The little booklet can be used for photos, journaling, or even better...BOTH! It could even be used as a little junk journal to put things like paint swatches from hmm lets see maybe a new beach condo that you've just bought and are remodeling so that you will not only be able to take before and after pictures but also know exactly what colors you used in repainting your new little slice of heaven.
This next one I made to give as a future gift.....I'm normally not a big green kind of girl, but am really loving this color combo of greens, blues and pink!
I changed a few things up in the next one.
I used some ribbon on the binding to add a little extra interest.
On the inside I didn't make the little pocket. Instead, I did a double waterfall will a velcro belly band.
After making the first one, as you can see it they became addicting to make. I'm not sure if I have them out of my system yet because even though I've been working on some other projects, I am still thinking about how I can change these up or different themes.
Thank you so much for stopping by and I'll be back soon with another post of a little tutorial for a micro mini/ATC.
Saturday, September 13, 2014
Having some issues with my blog...
Hi everyone! I do apologize but I'm having some technical difficulties right now posting pictures on my blog. I do have some fun crafty projects to show as well as another tutorial to share with you all as soon as I can get these issues resolved.
It was a very busy summer here at Candy Creek which meant that my blog was a tad neglected and I'm sorry for that but as life happens it's just really hard to keep up everything. I'm hoping that once the above issues are straightened out and everything is back to normal. Then I will be able to share some inspirational crafty goodies with you.
It's feeling a lot like fall here. Today it's rainy, dreary and we have a chill in the air. But on a positive note, it's time for my crafty creative side to come out and for me to start hibernating and churning out projects to share with you all.
While I'm working on the picture issue. You all feel free to look around at some of my older posts from past years and who knows, you may find a project or two that you had overlooked before that will inspire you to make some creative today.
Have a wonderful weekend everyone and I'll see you soon!
Subscribe to:
Comments (Atom)


